Aurora Borealis Photography
Early on in my photographic journey the Aurora Borealis was high on my "shot list" I wanted to capture the Northern Lights in a way that made people go "oohh, awhhh" like they used to do at 4th of July Fireworks shows. However, being in Montana the opportunities were rare and I was not in a position to afford a trip to Alaska, Iceland or Greenland to capture them. So it stayed on my shot list as a wish list item until September of 2023.
During an archery hunting trip in Eastern Montana I set my camera up to do a night sky timelapse. By happenstance I pointed my camera to the northwest horizon where a few trees broke up the horizontal horizon line and went to bed. A couple weeks later when I got around to processing the photos I realized I had accidently and unknowingly captured the northern lights by using the settings for night sky photography. I had used the Rule of 500 to set my exposure at 20 seconds, f4.0 (my fastest lens at the time), neutral (daylight) White Balance, and a 10000 ISO to capture the below photo.
In hindsight I remembered seeing what I thought of as a "moon" beam in the sky coming thru the clouds where the green and purple pillar are in the photo. This gave me hope that by using a long exposure and night sky photography settings I could capture the northern lights even when faint and colorless to the naked eye.
Over the year I have taken numerous photos of the Aurora using these same settings, and have captured a variety of color combinations, of varying brightnesses. During this time I experimented with reducing shutter down to 8 seconds, and varying the ISO. I also purchased a couple of faster lenses (f/2.8) and started using multiple cameras and angles to capture more photos.
Aurora Photo Captures from Sept 2023 thru August 2024:
May 10th Aurora with 5600K WB and no Yellow Hue adjustment.
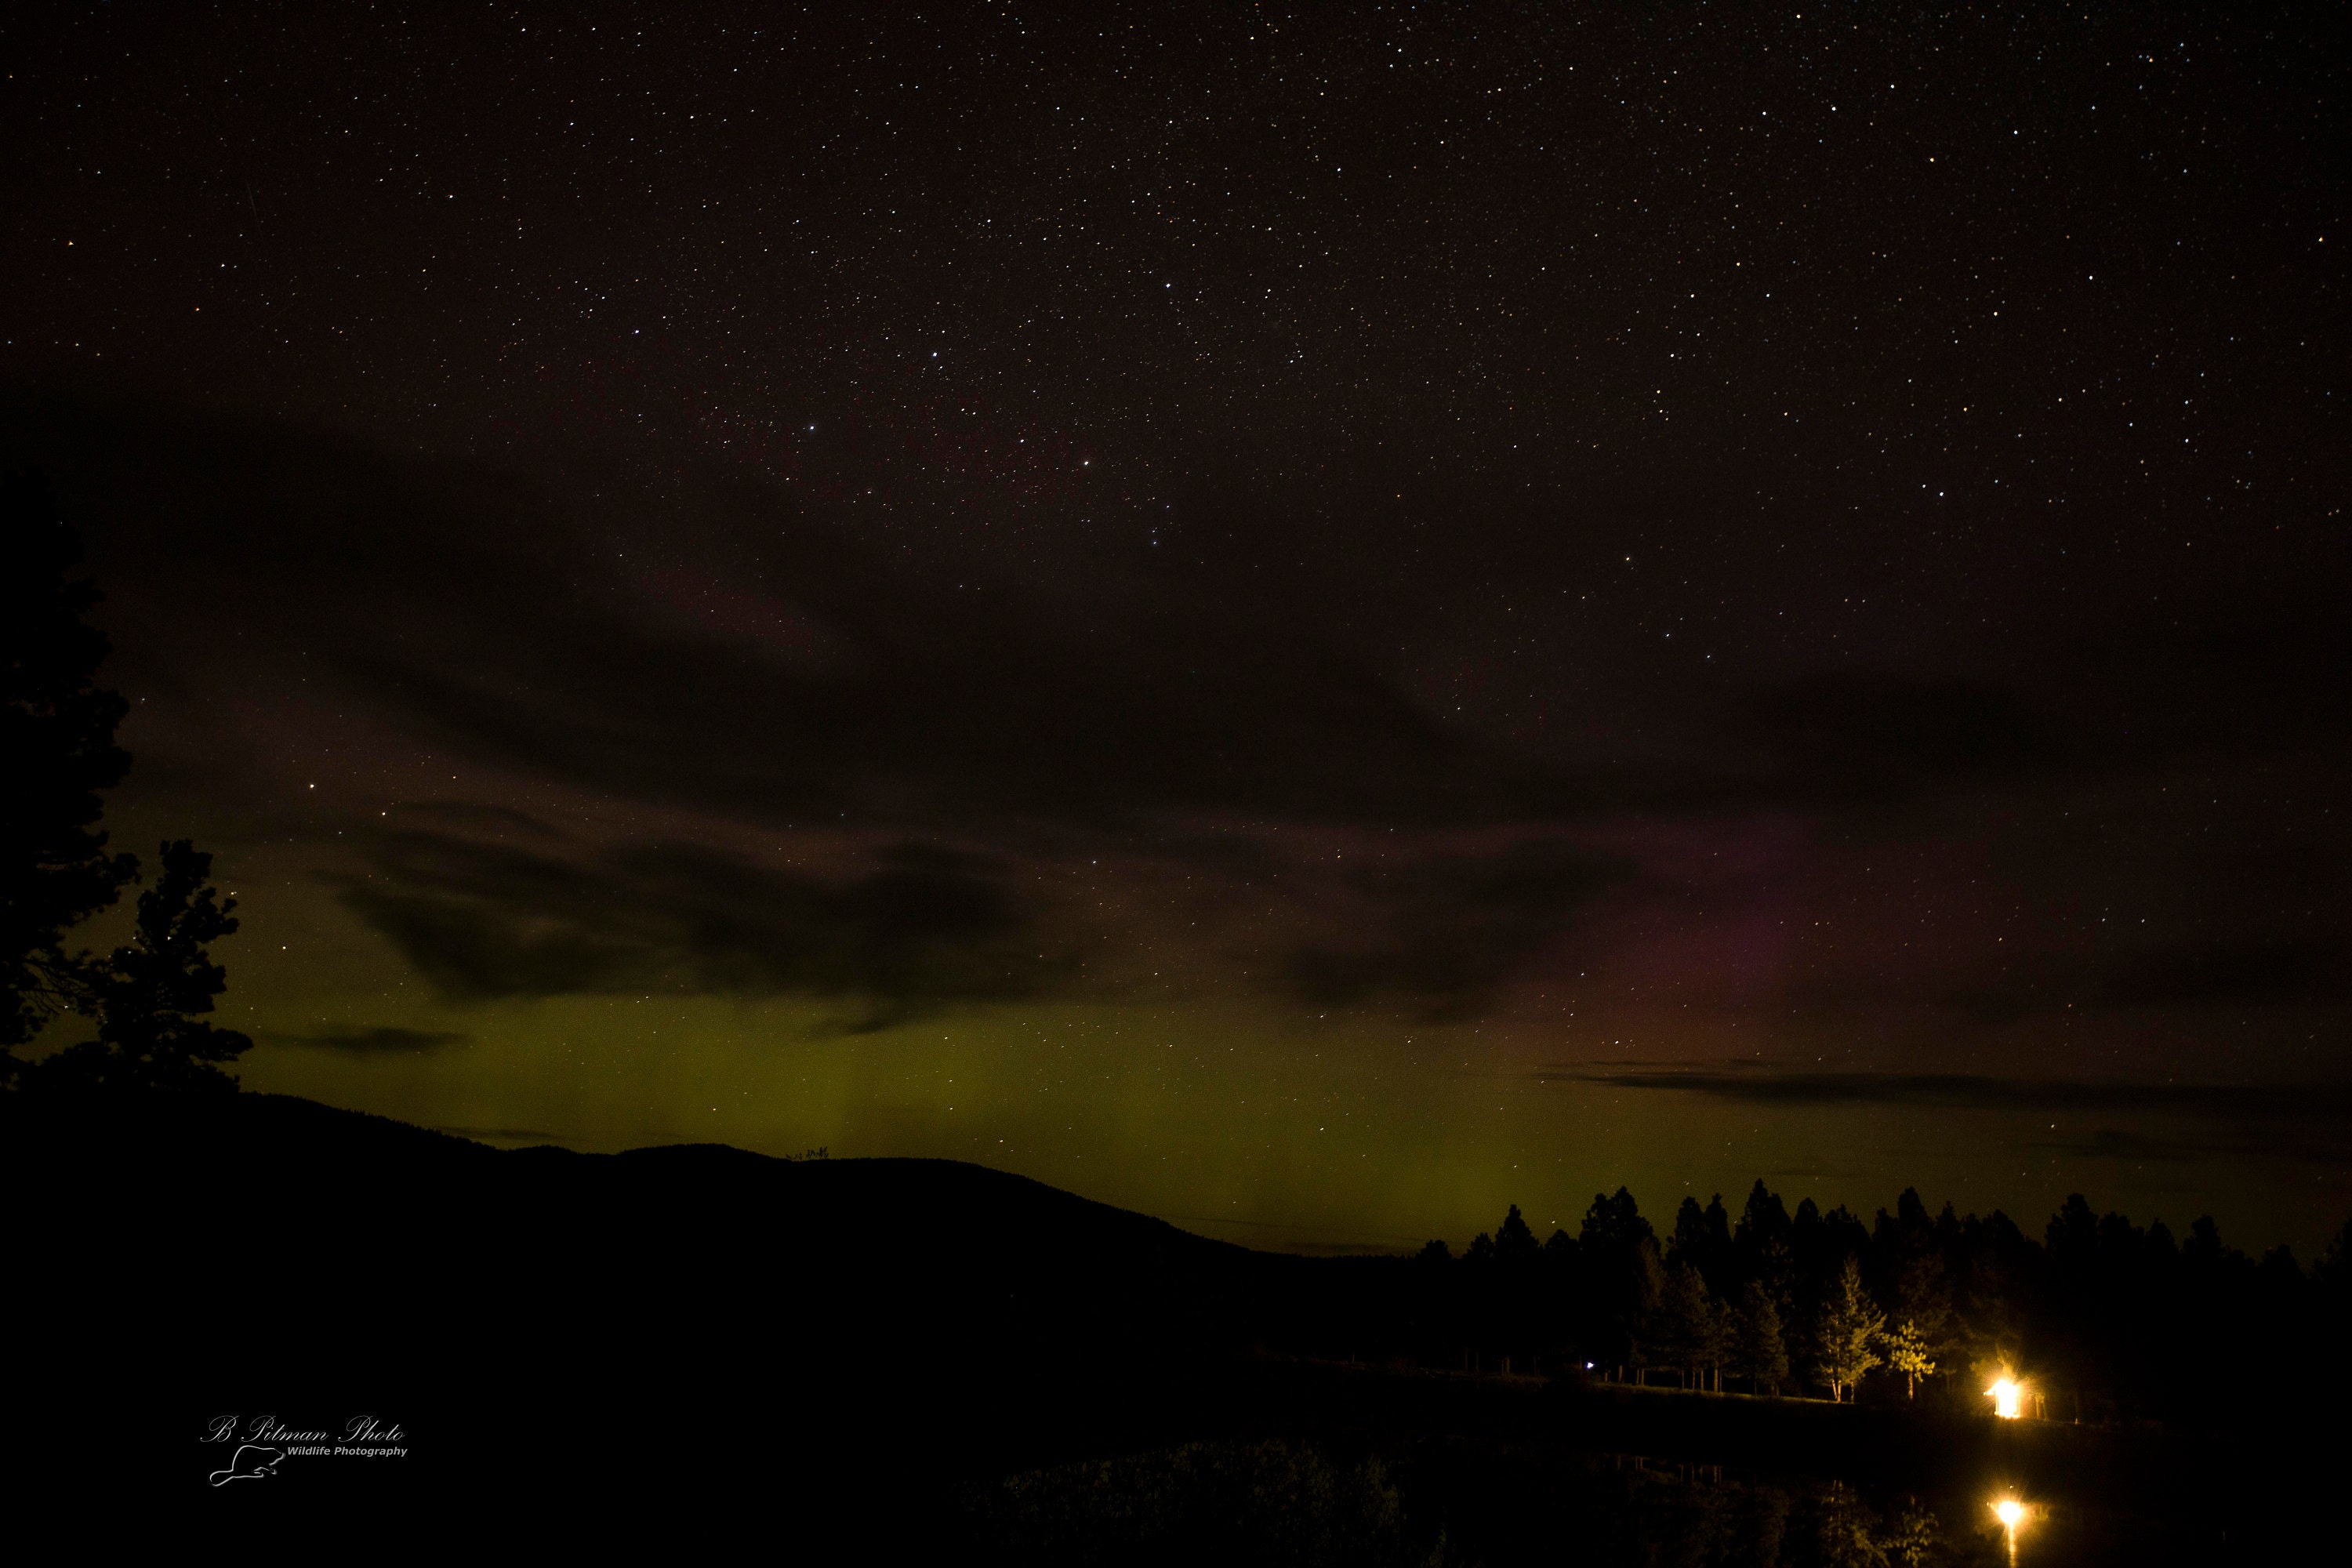
Photo taken on May 12th with 5600K WB and no Color Adjustments.
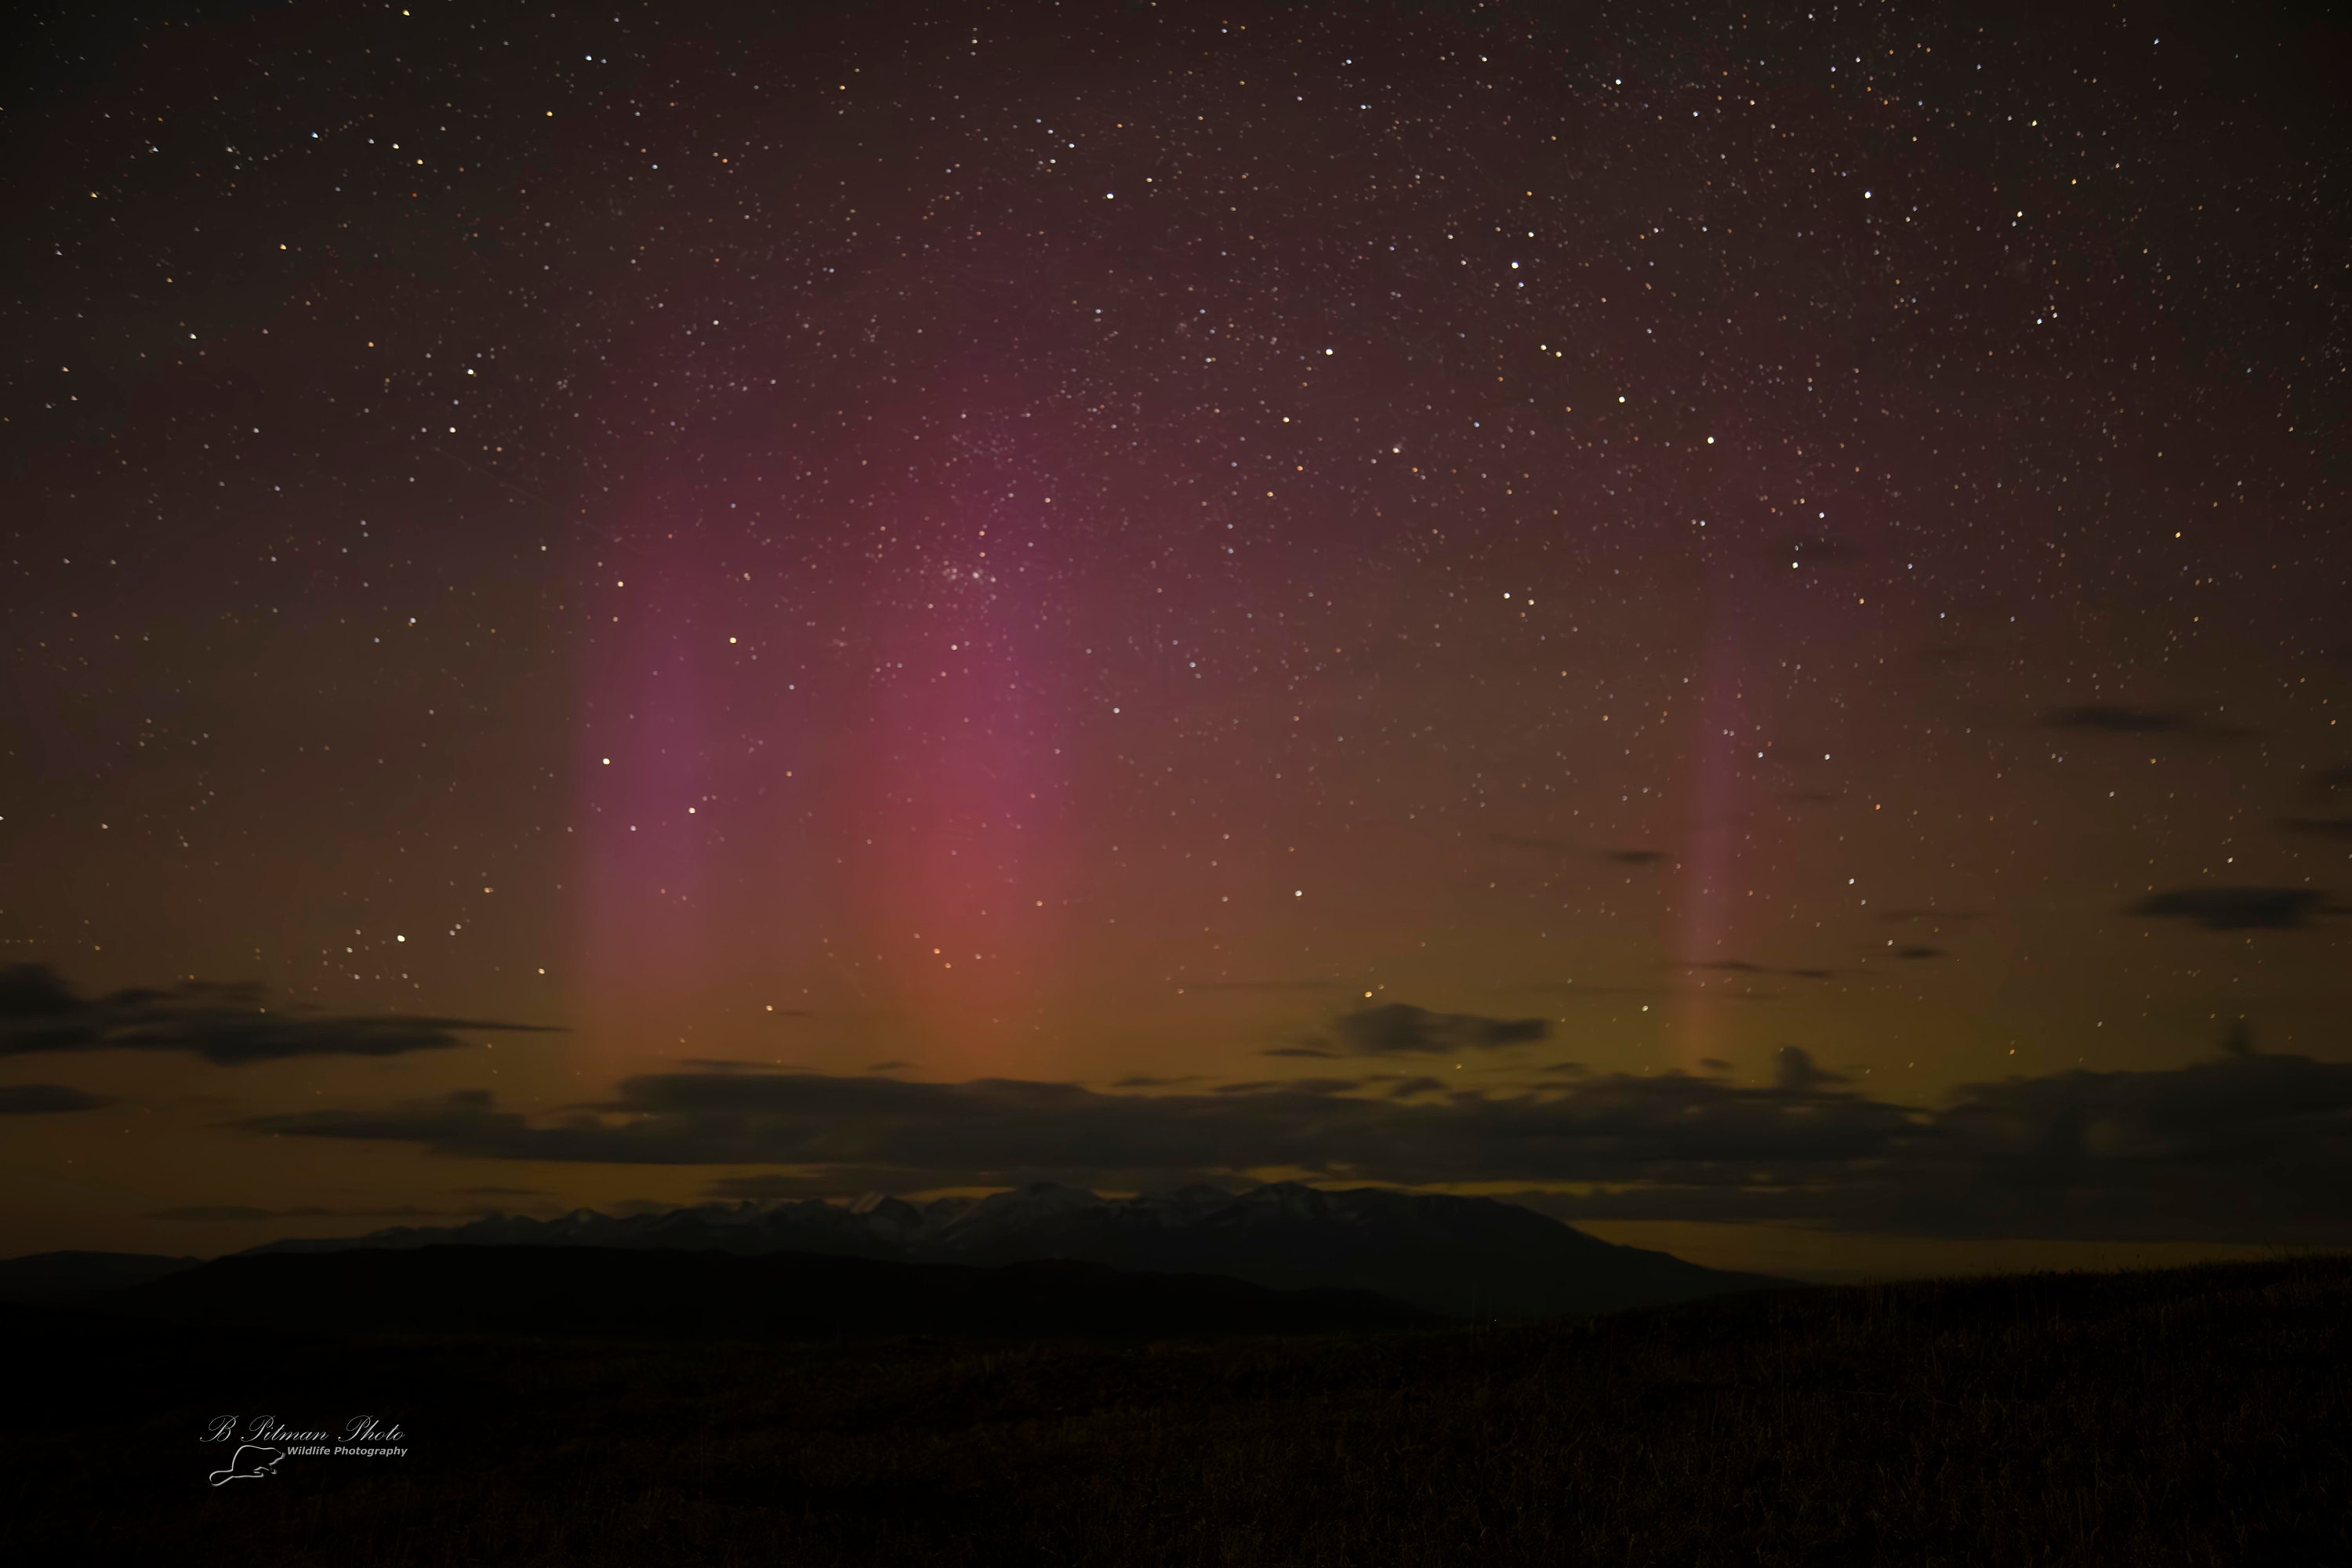
May 13th Aurora over the Crazy Mountains with 5600K WB and no color adjustment.
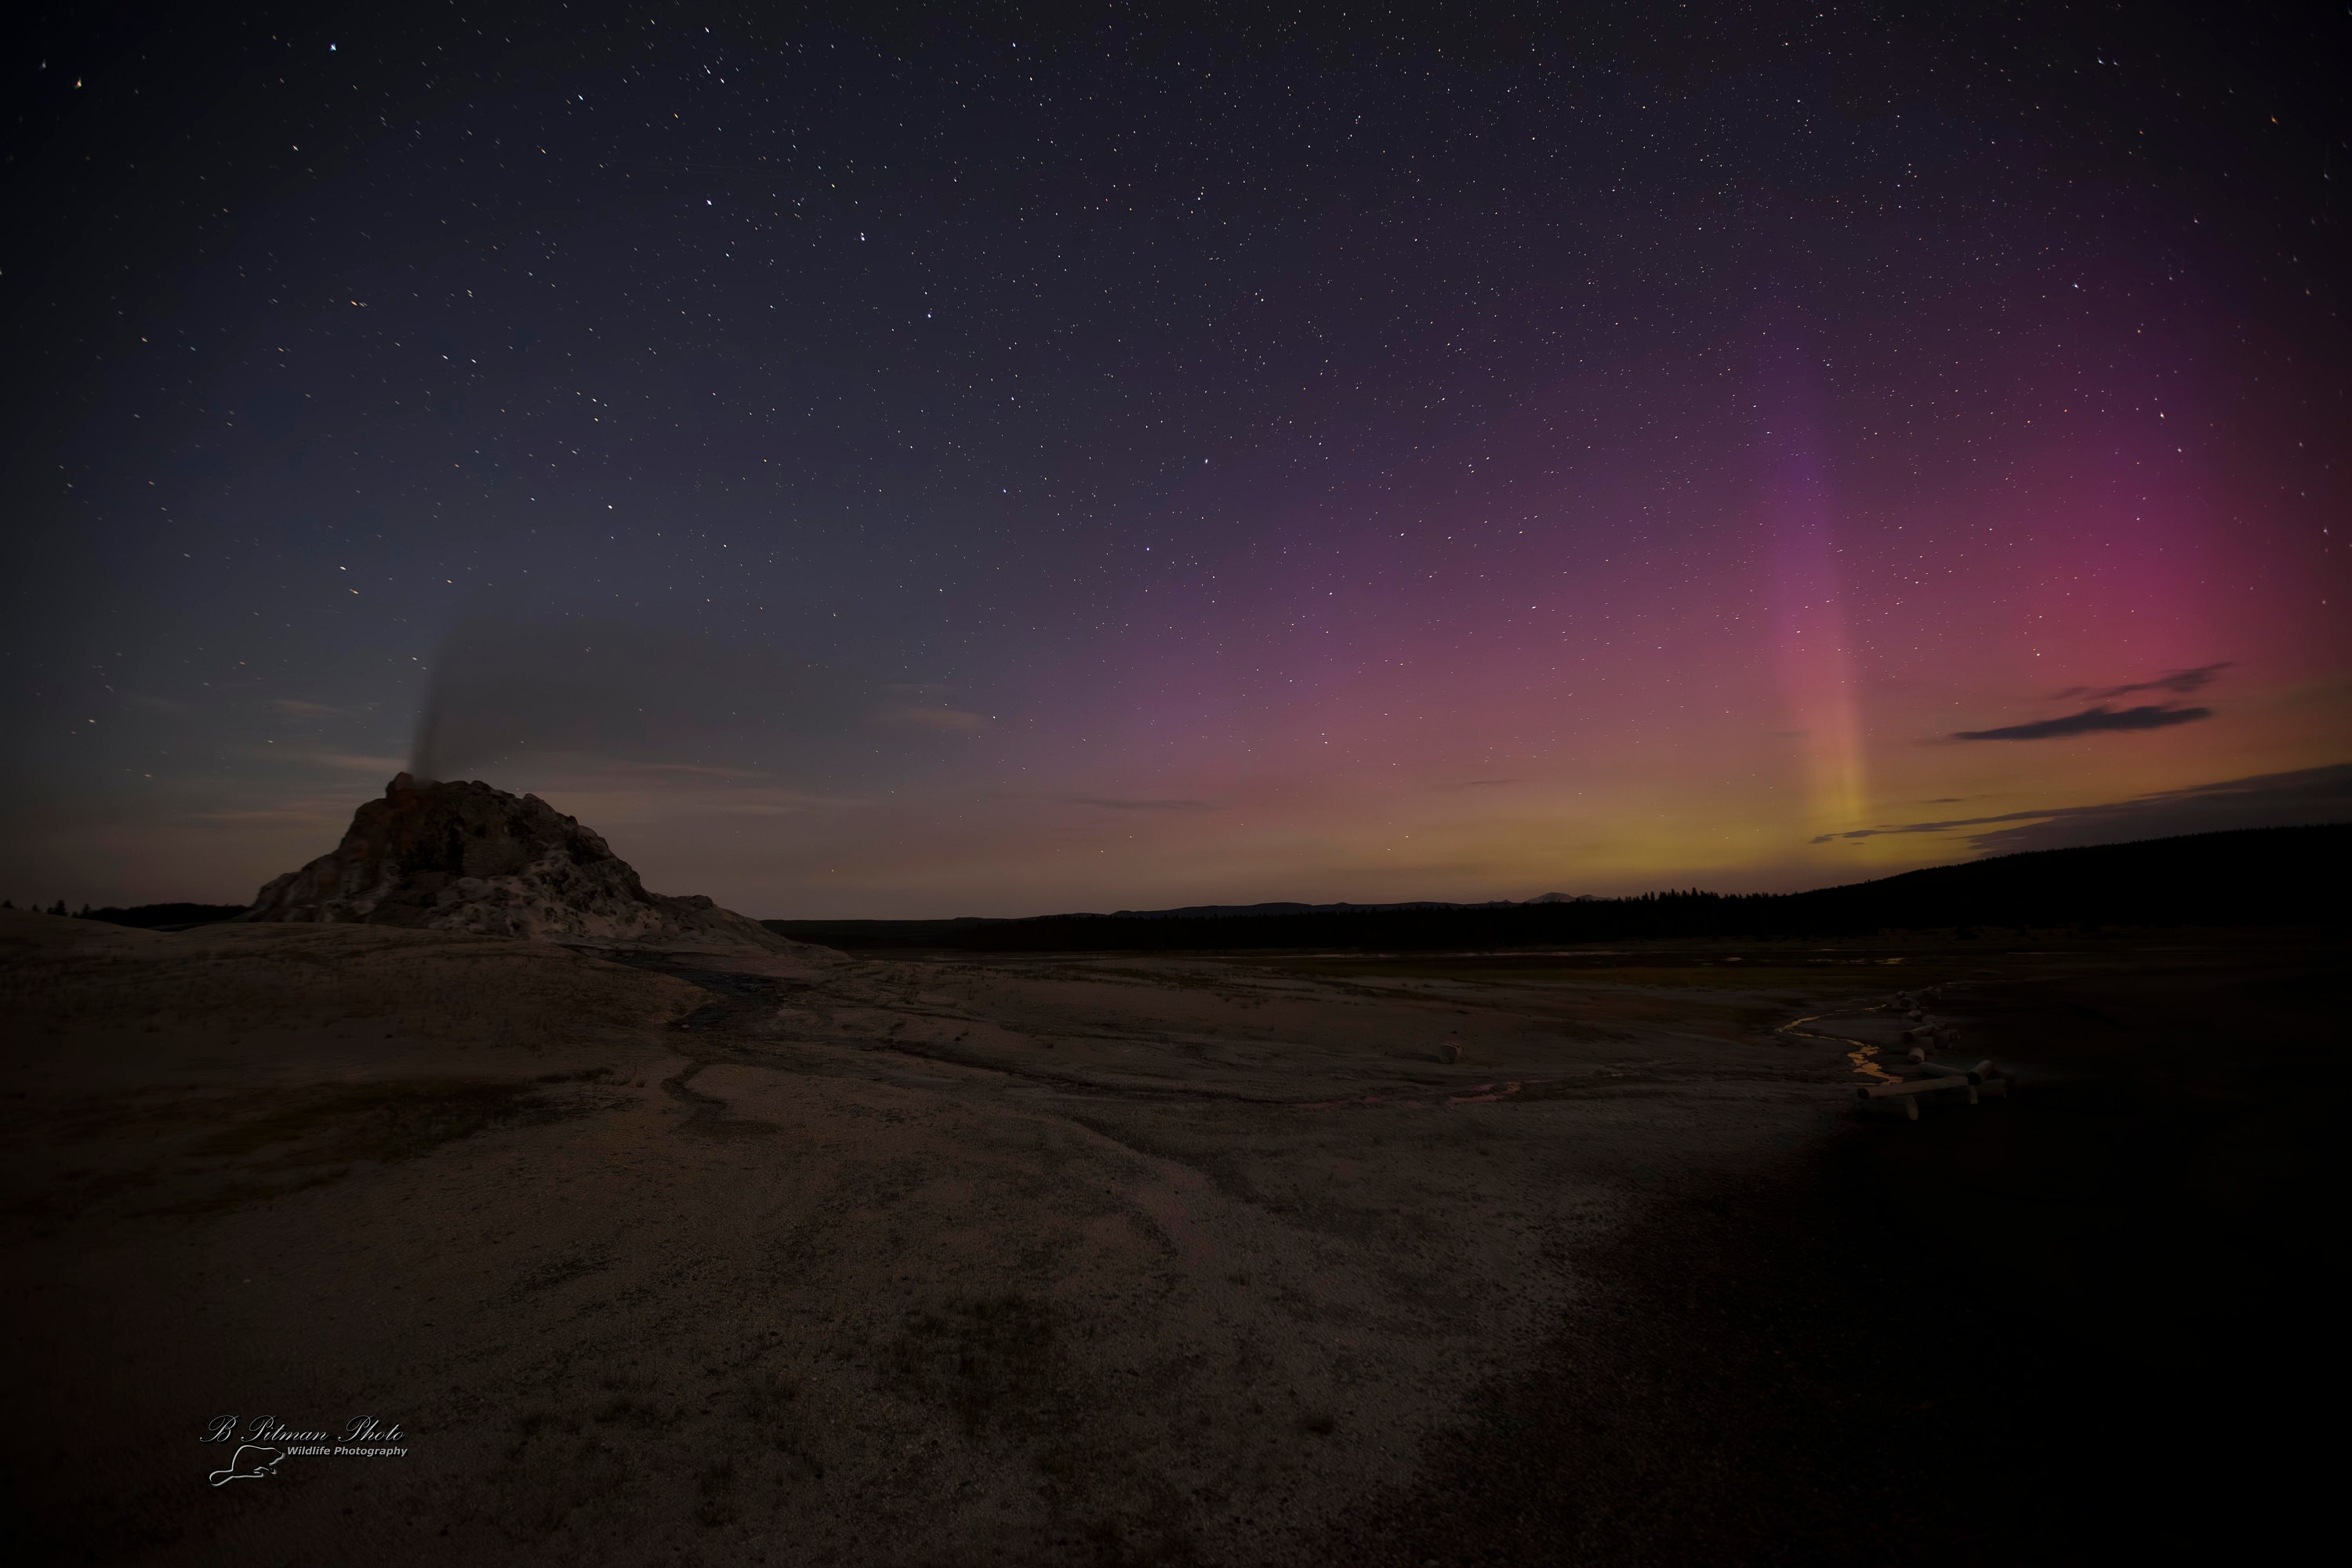
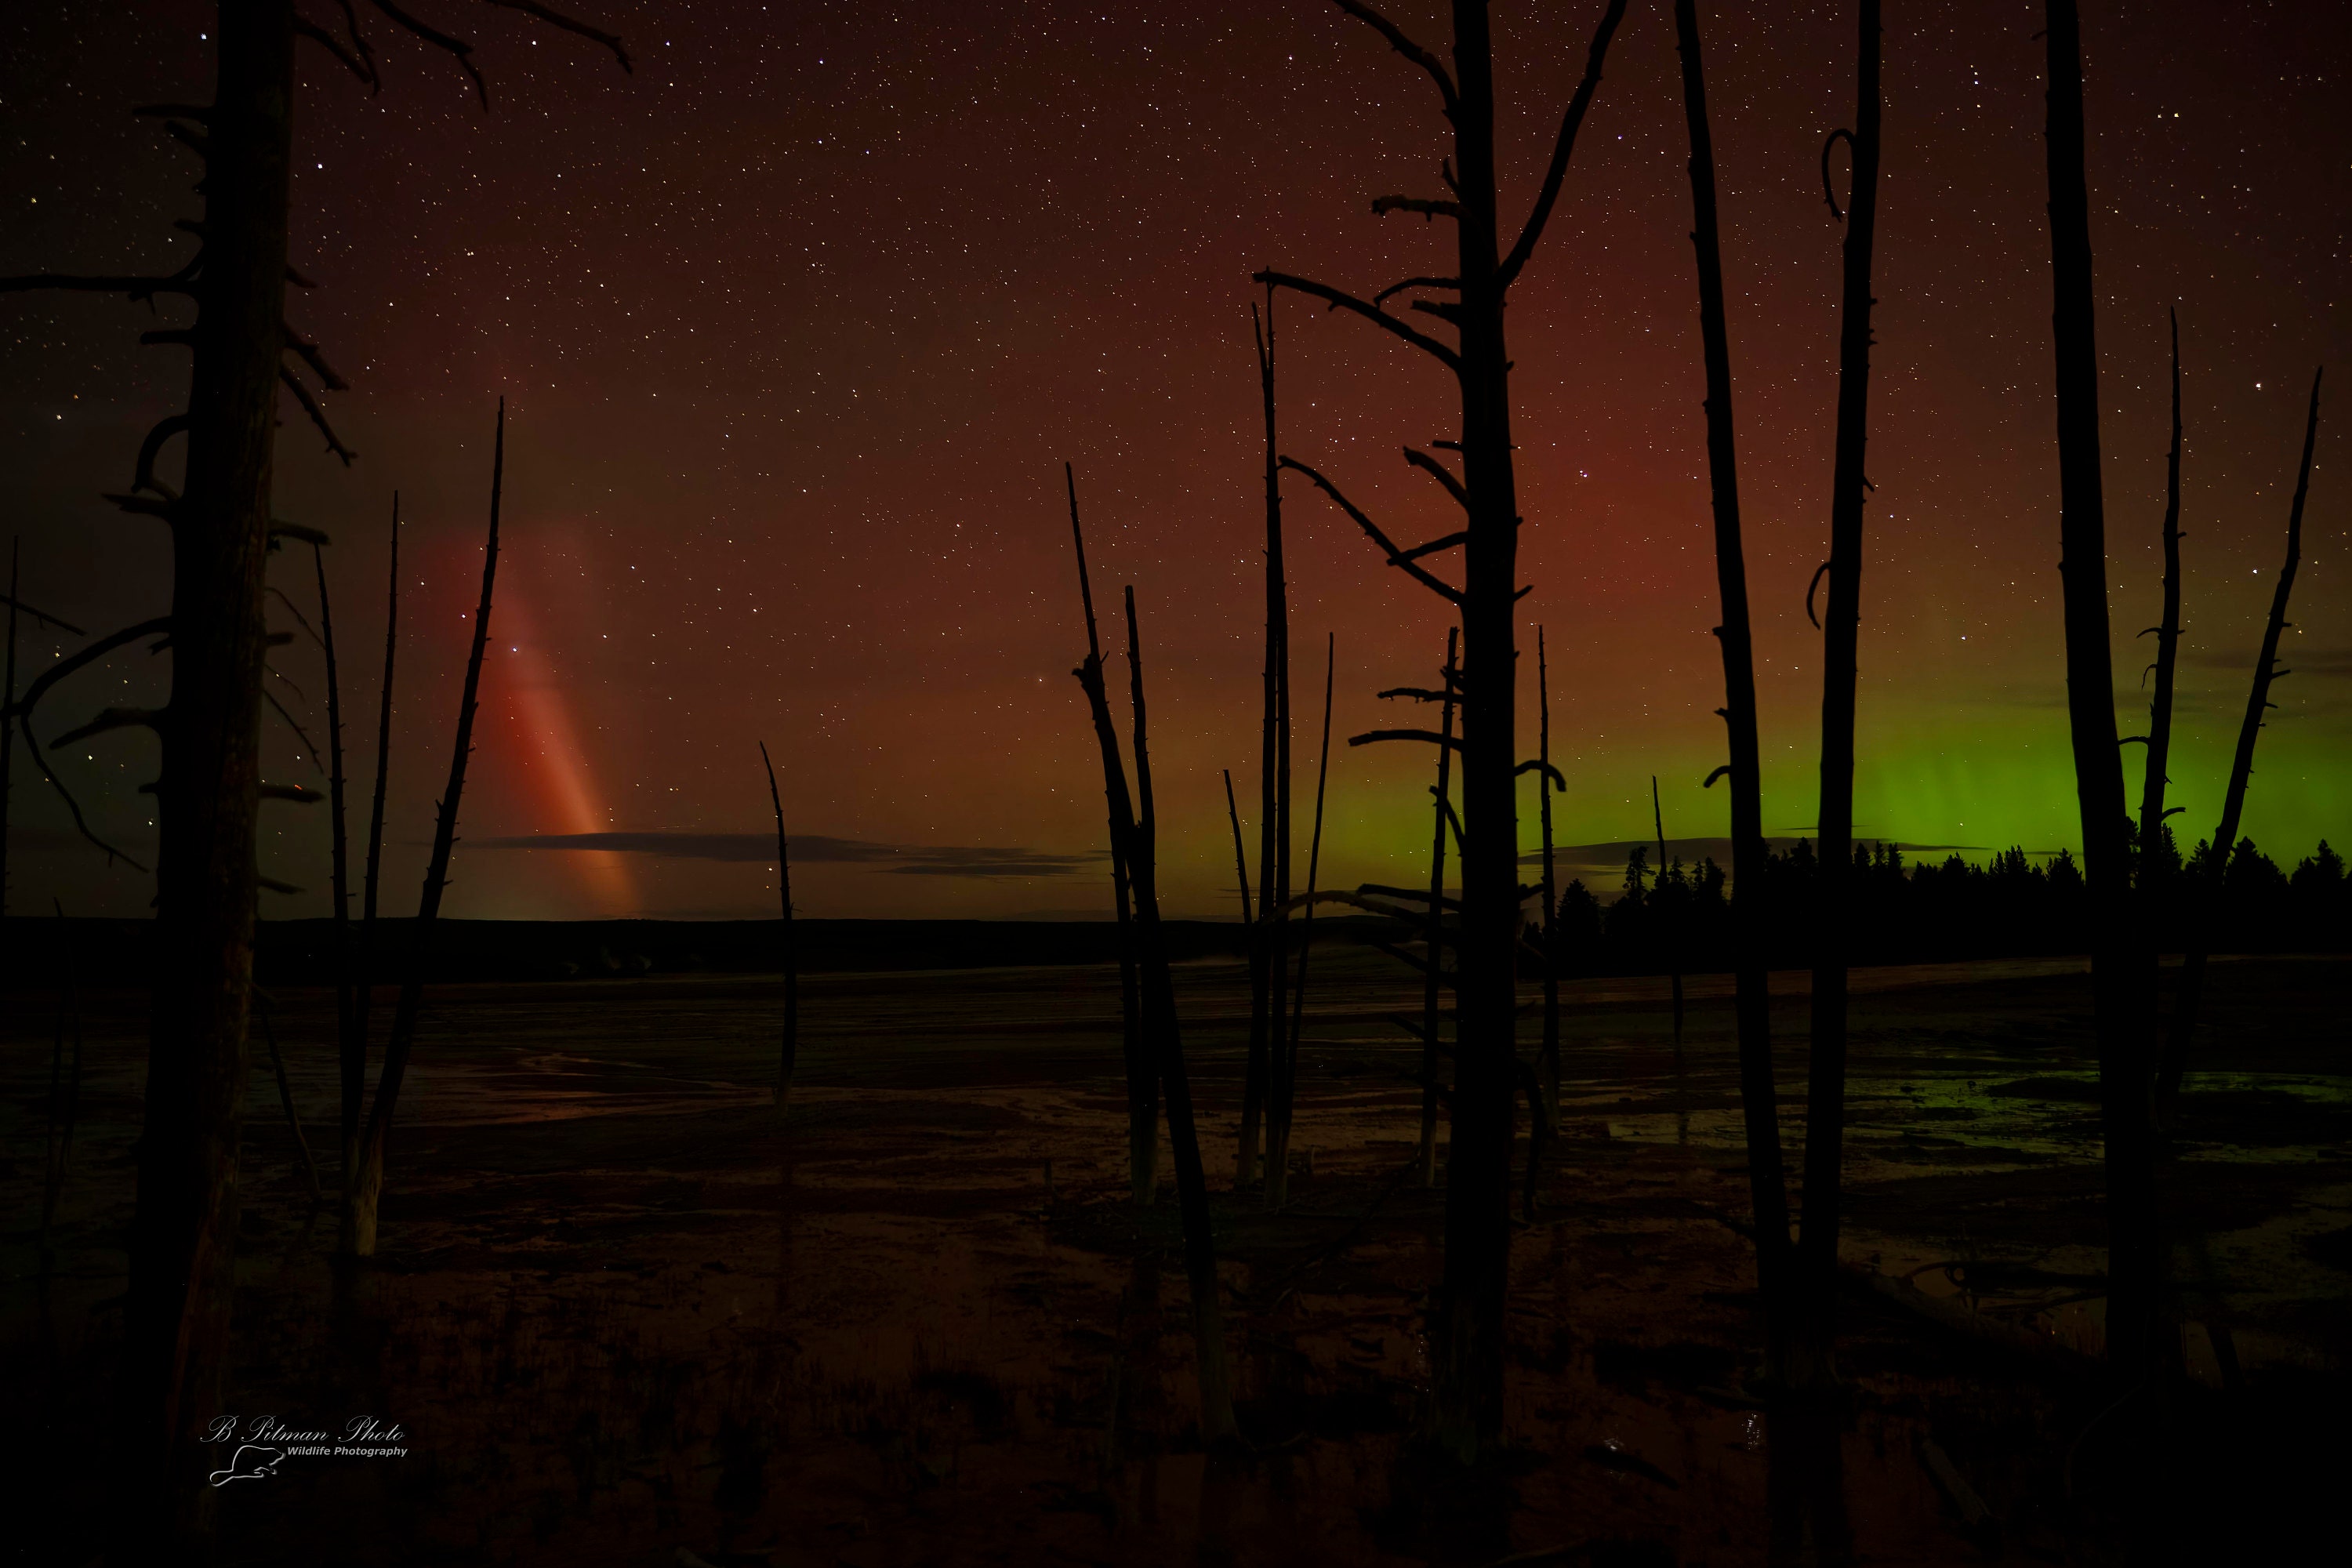
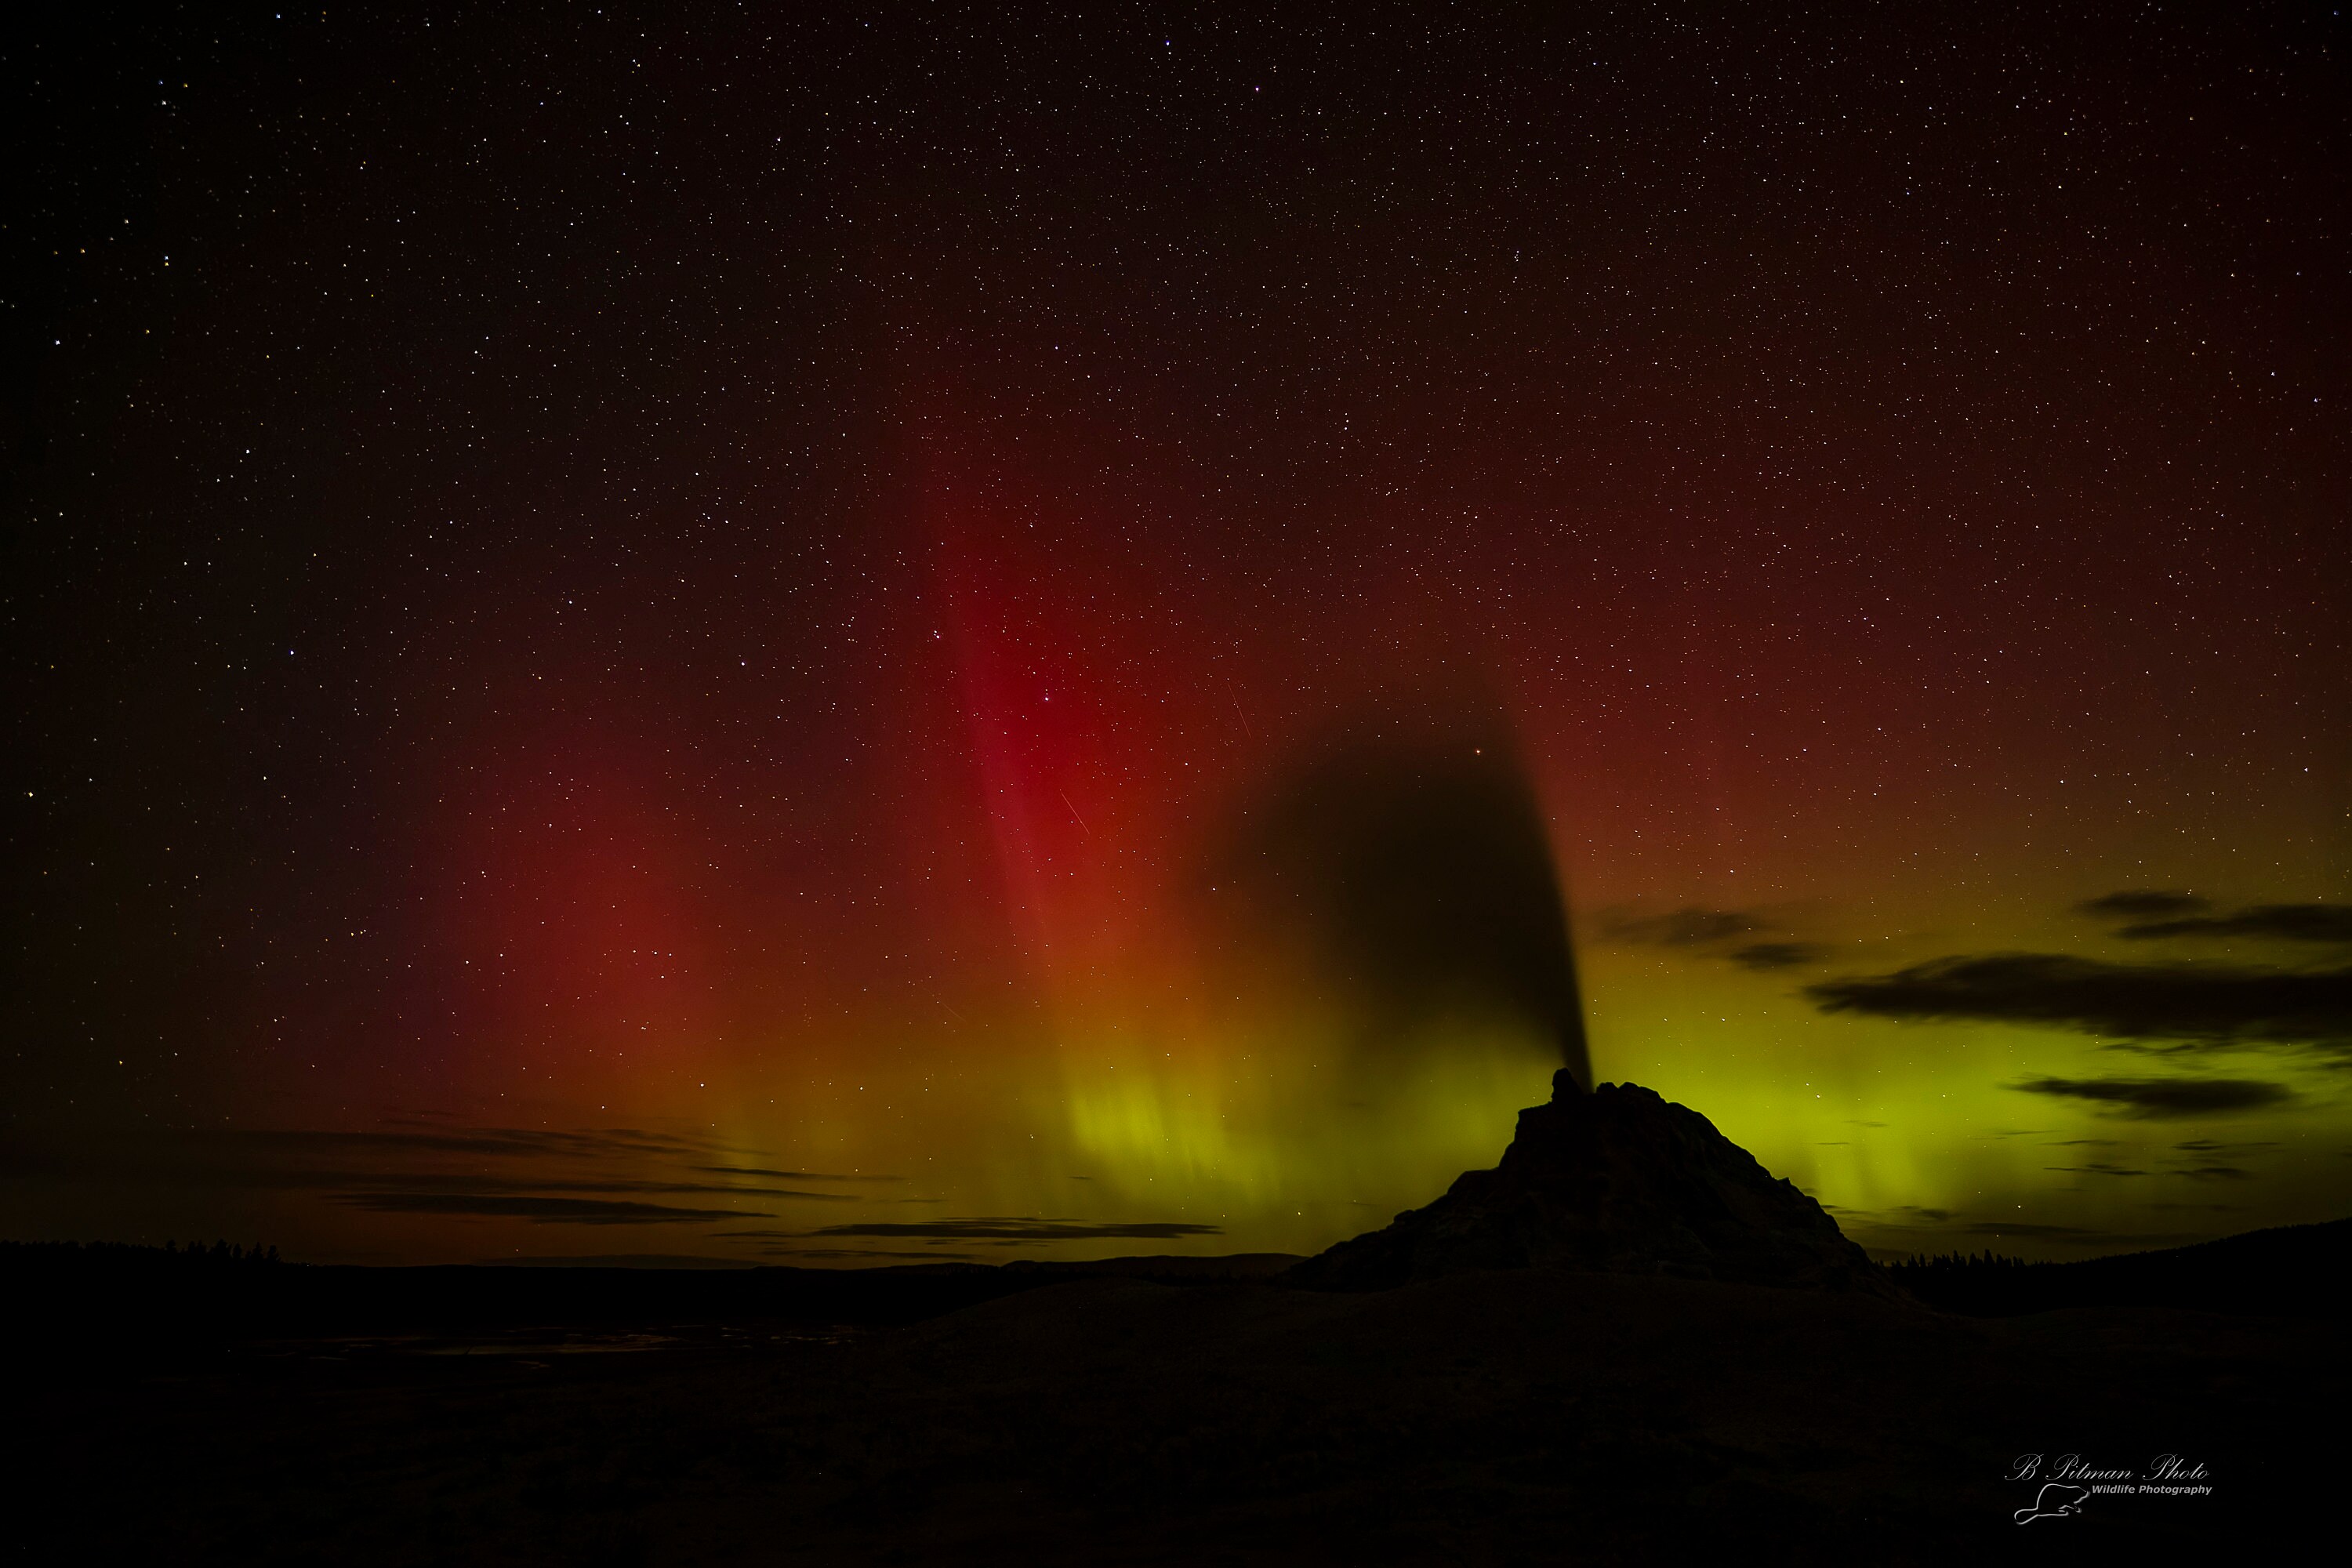
July 25th Aurora over White Dome Geyser in Yellowstone National Park, 5600K WB with no Color Adjustment.
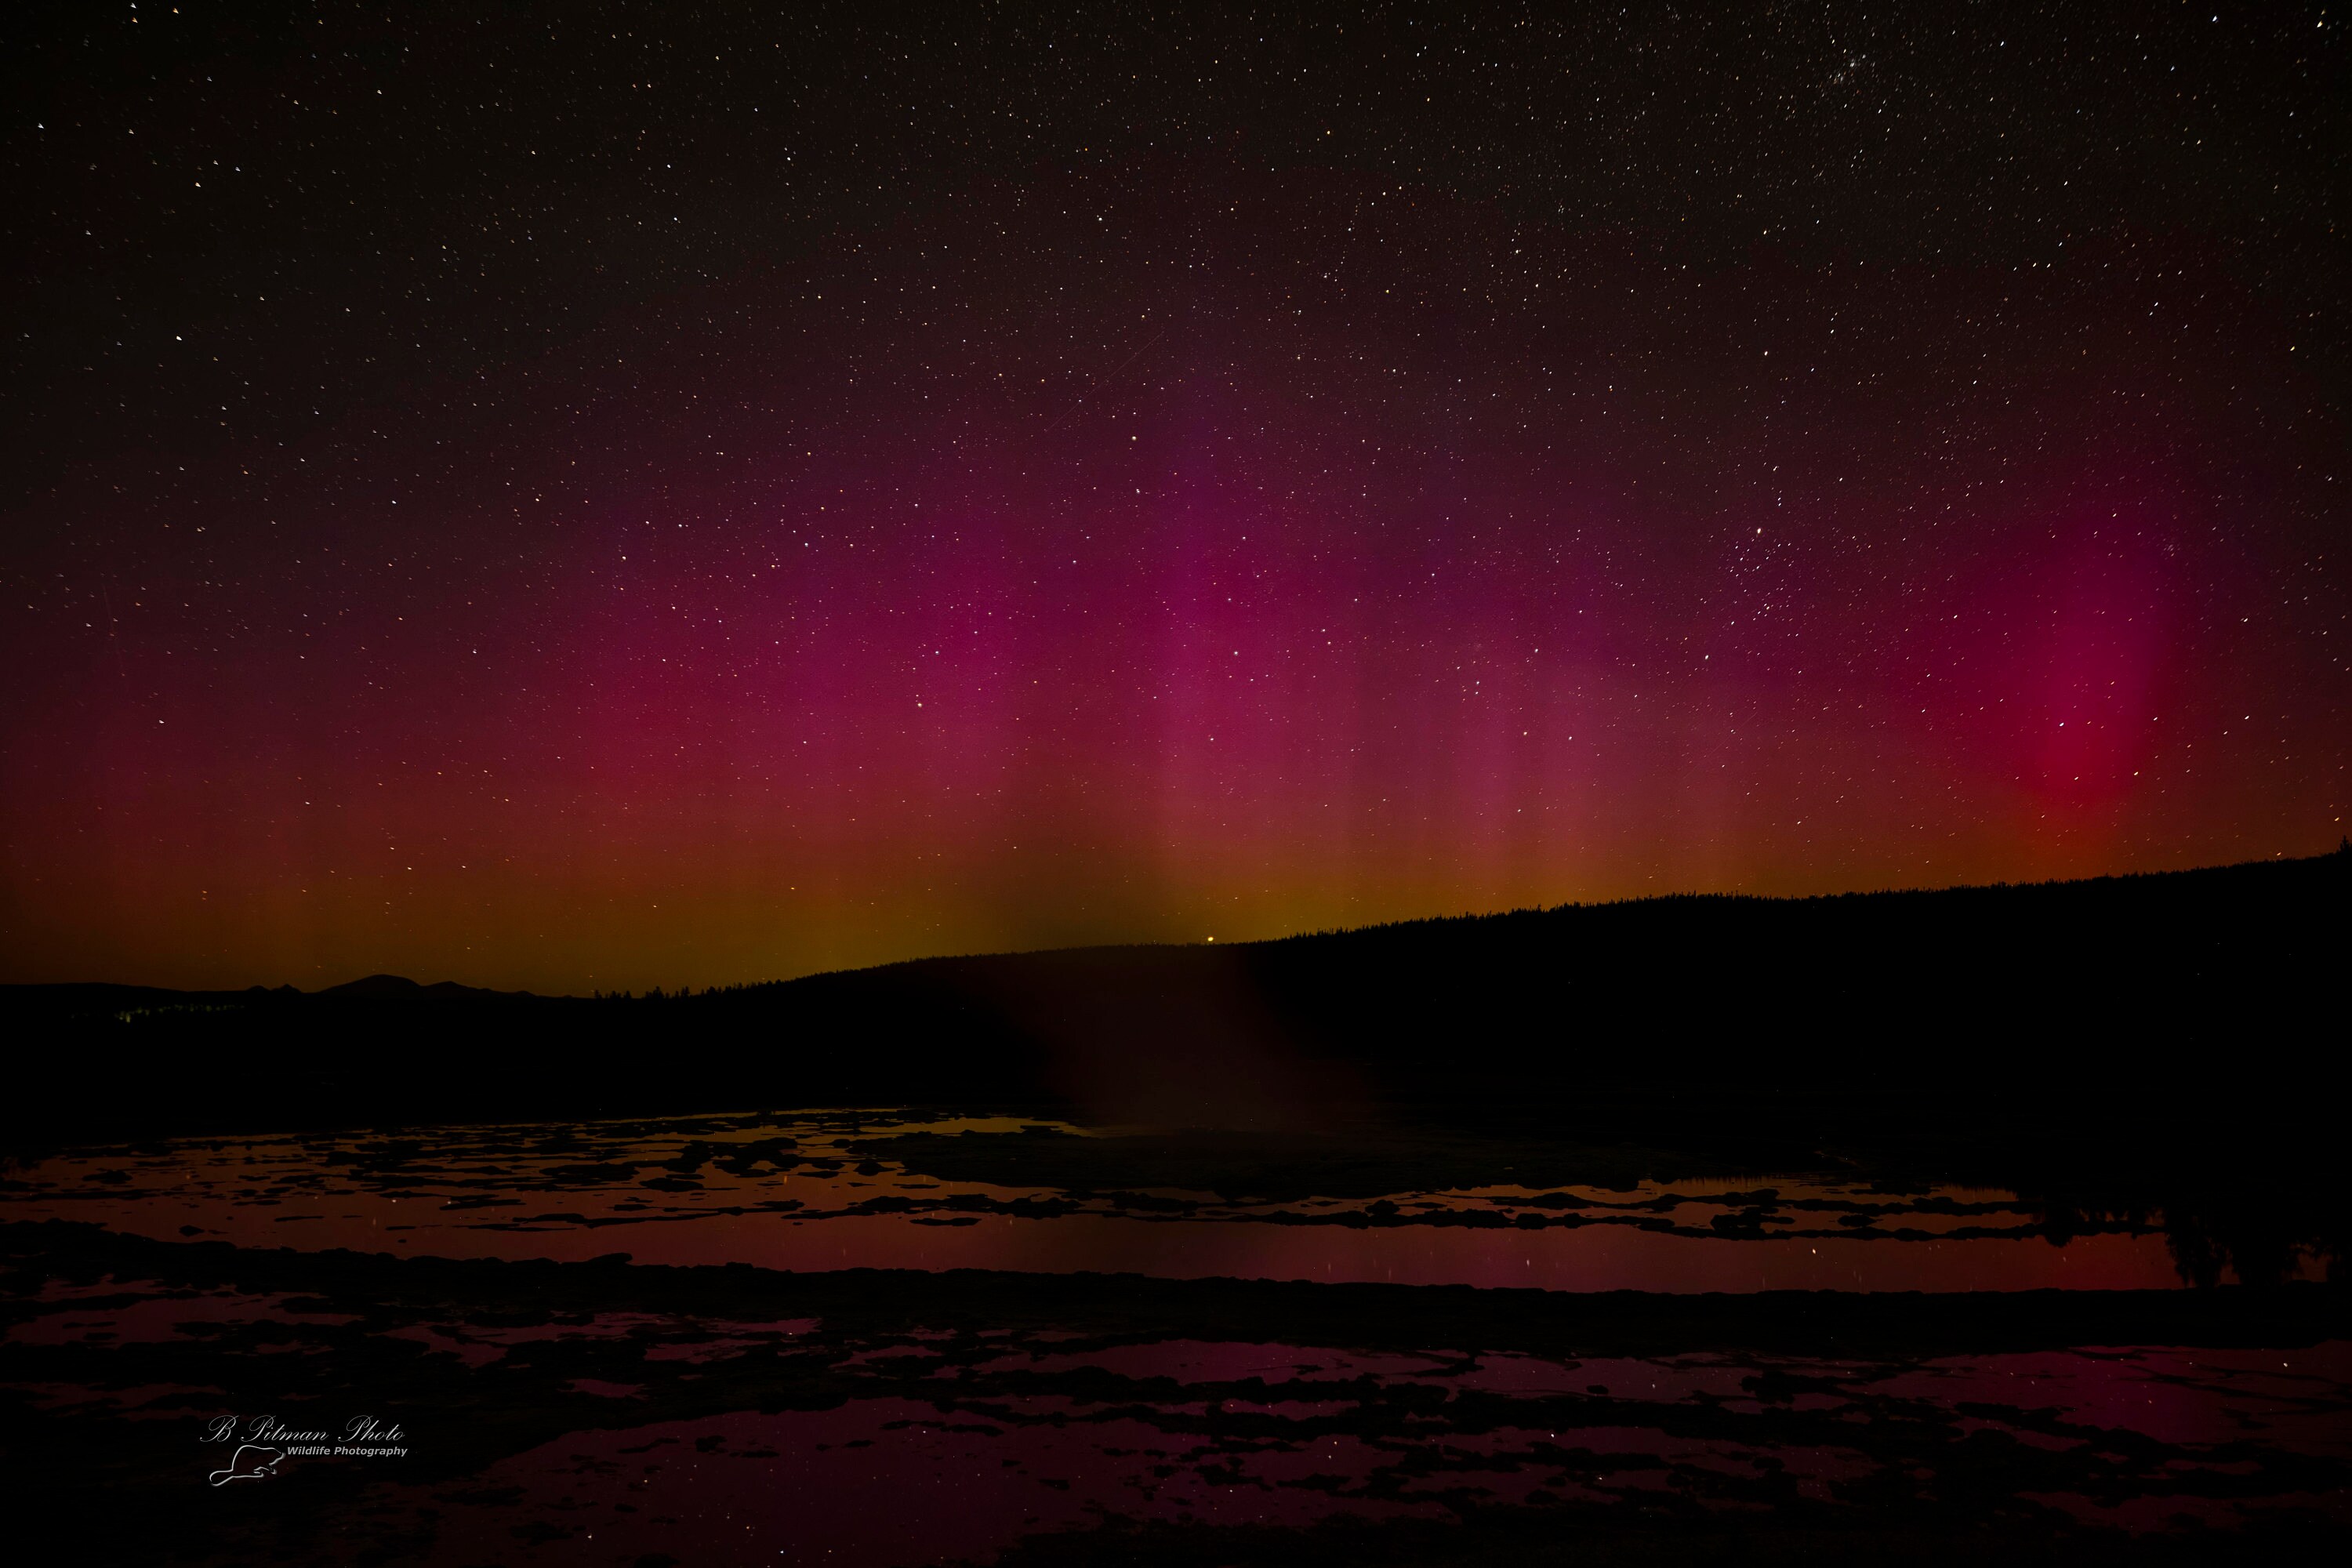
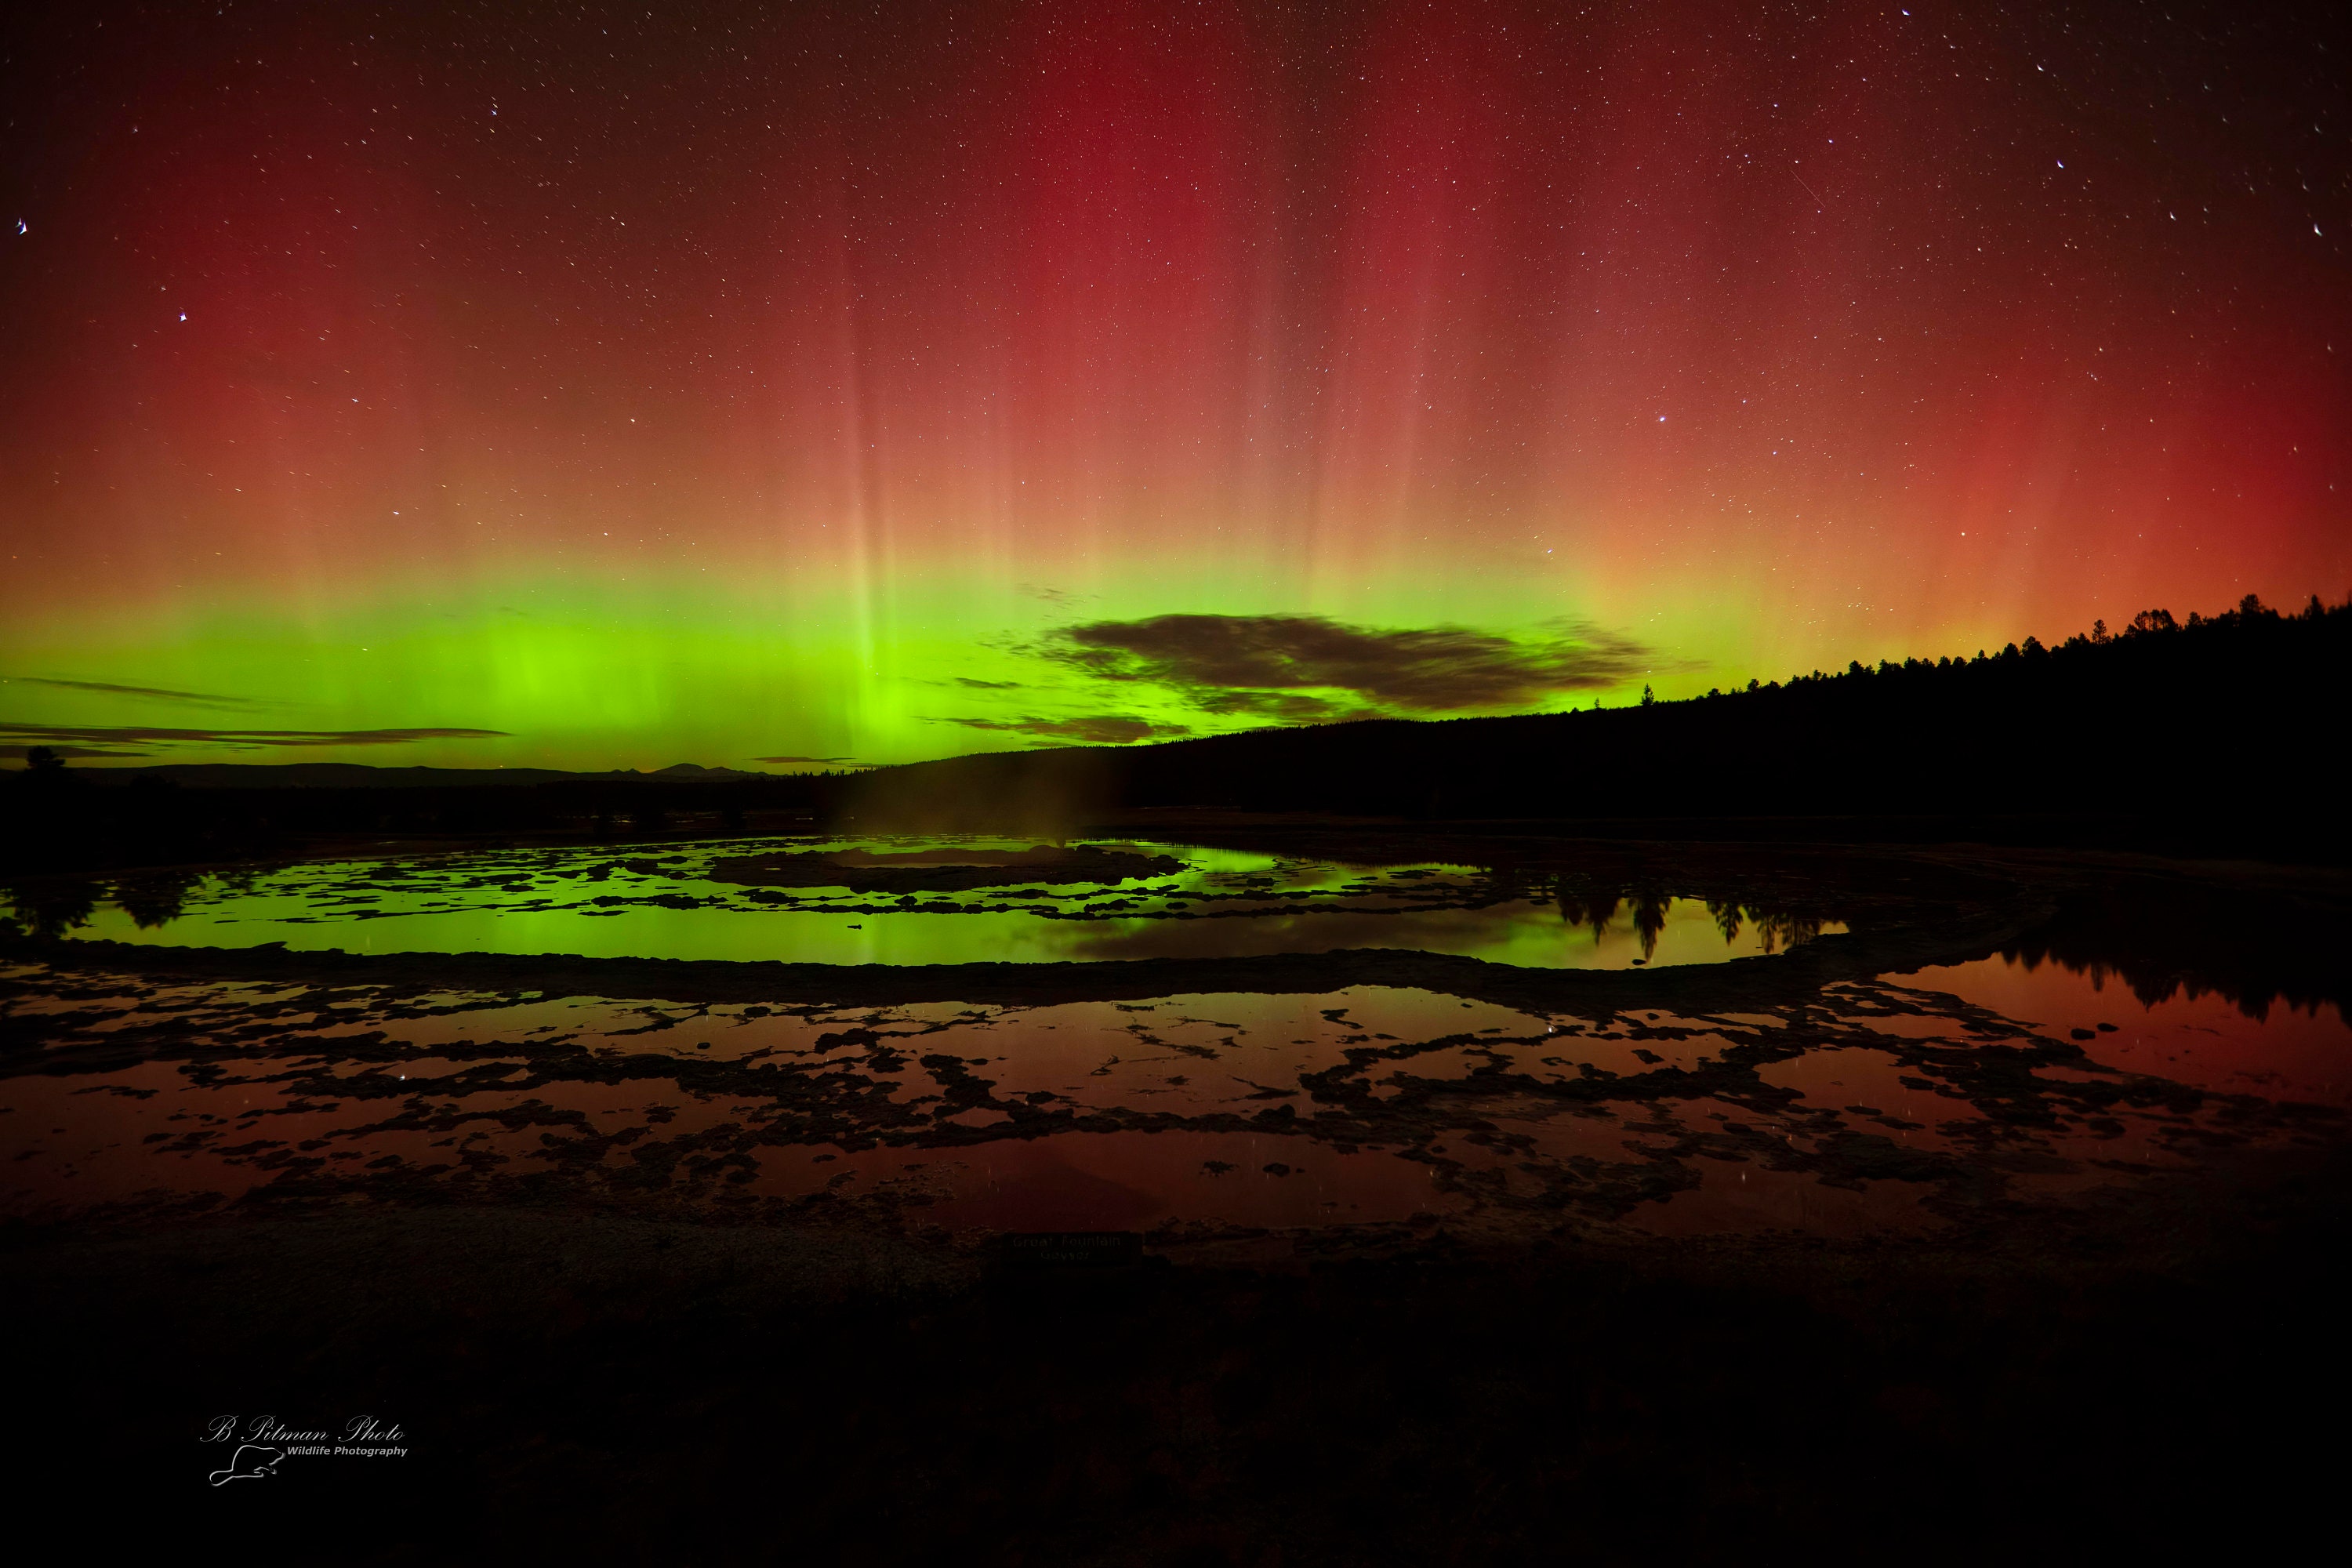
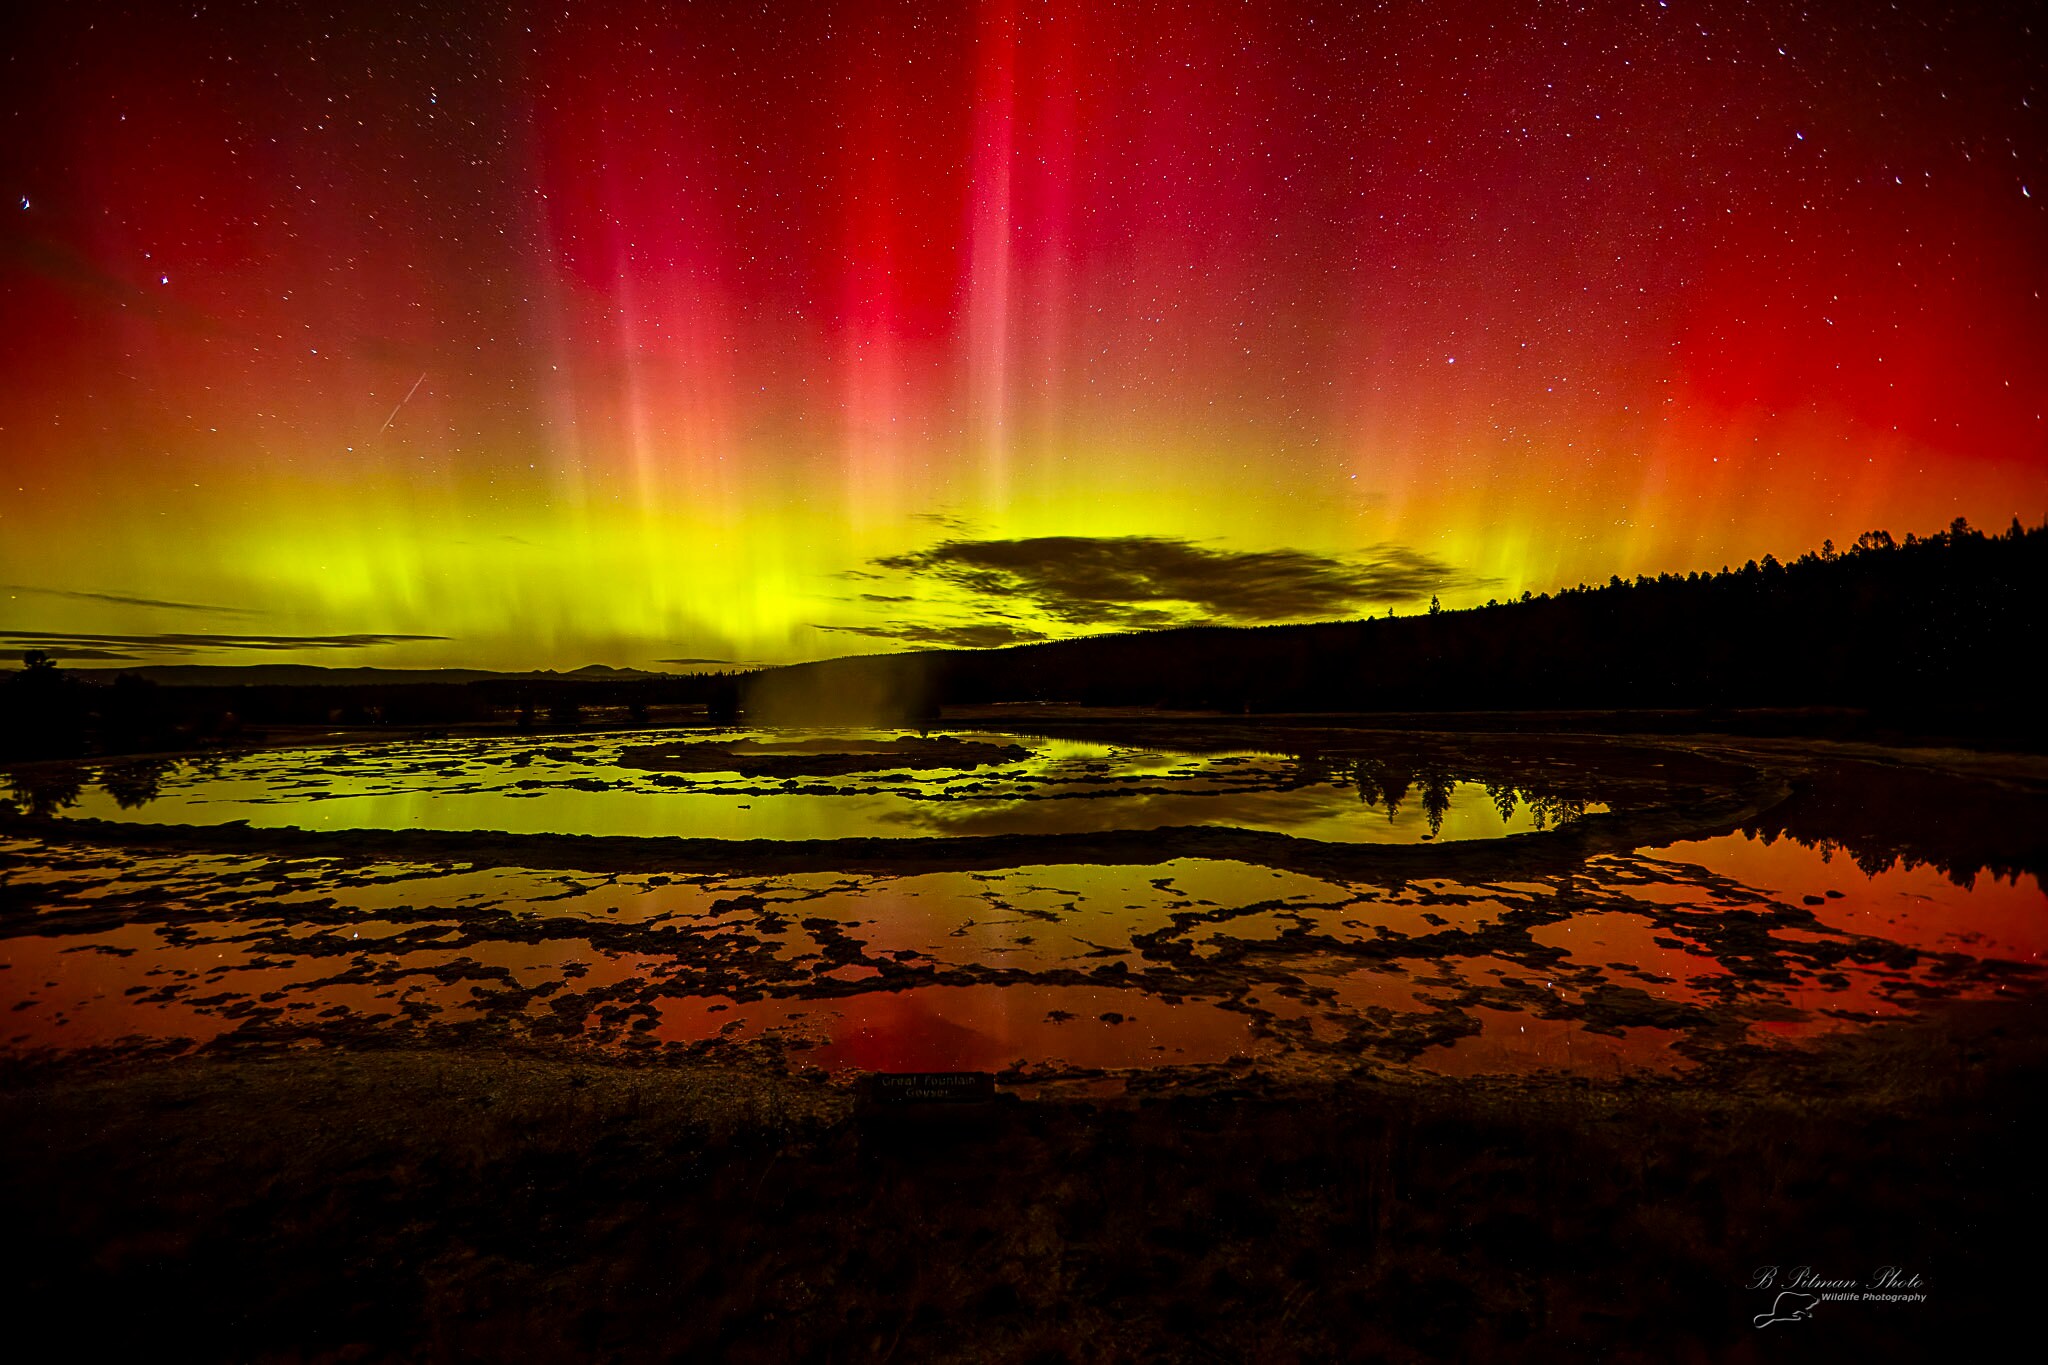
July 31st Aurora over Great Fountain Geyser with 5600K White Balance and no Color Adjustment.
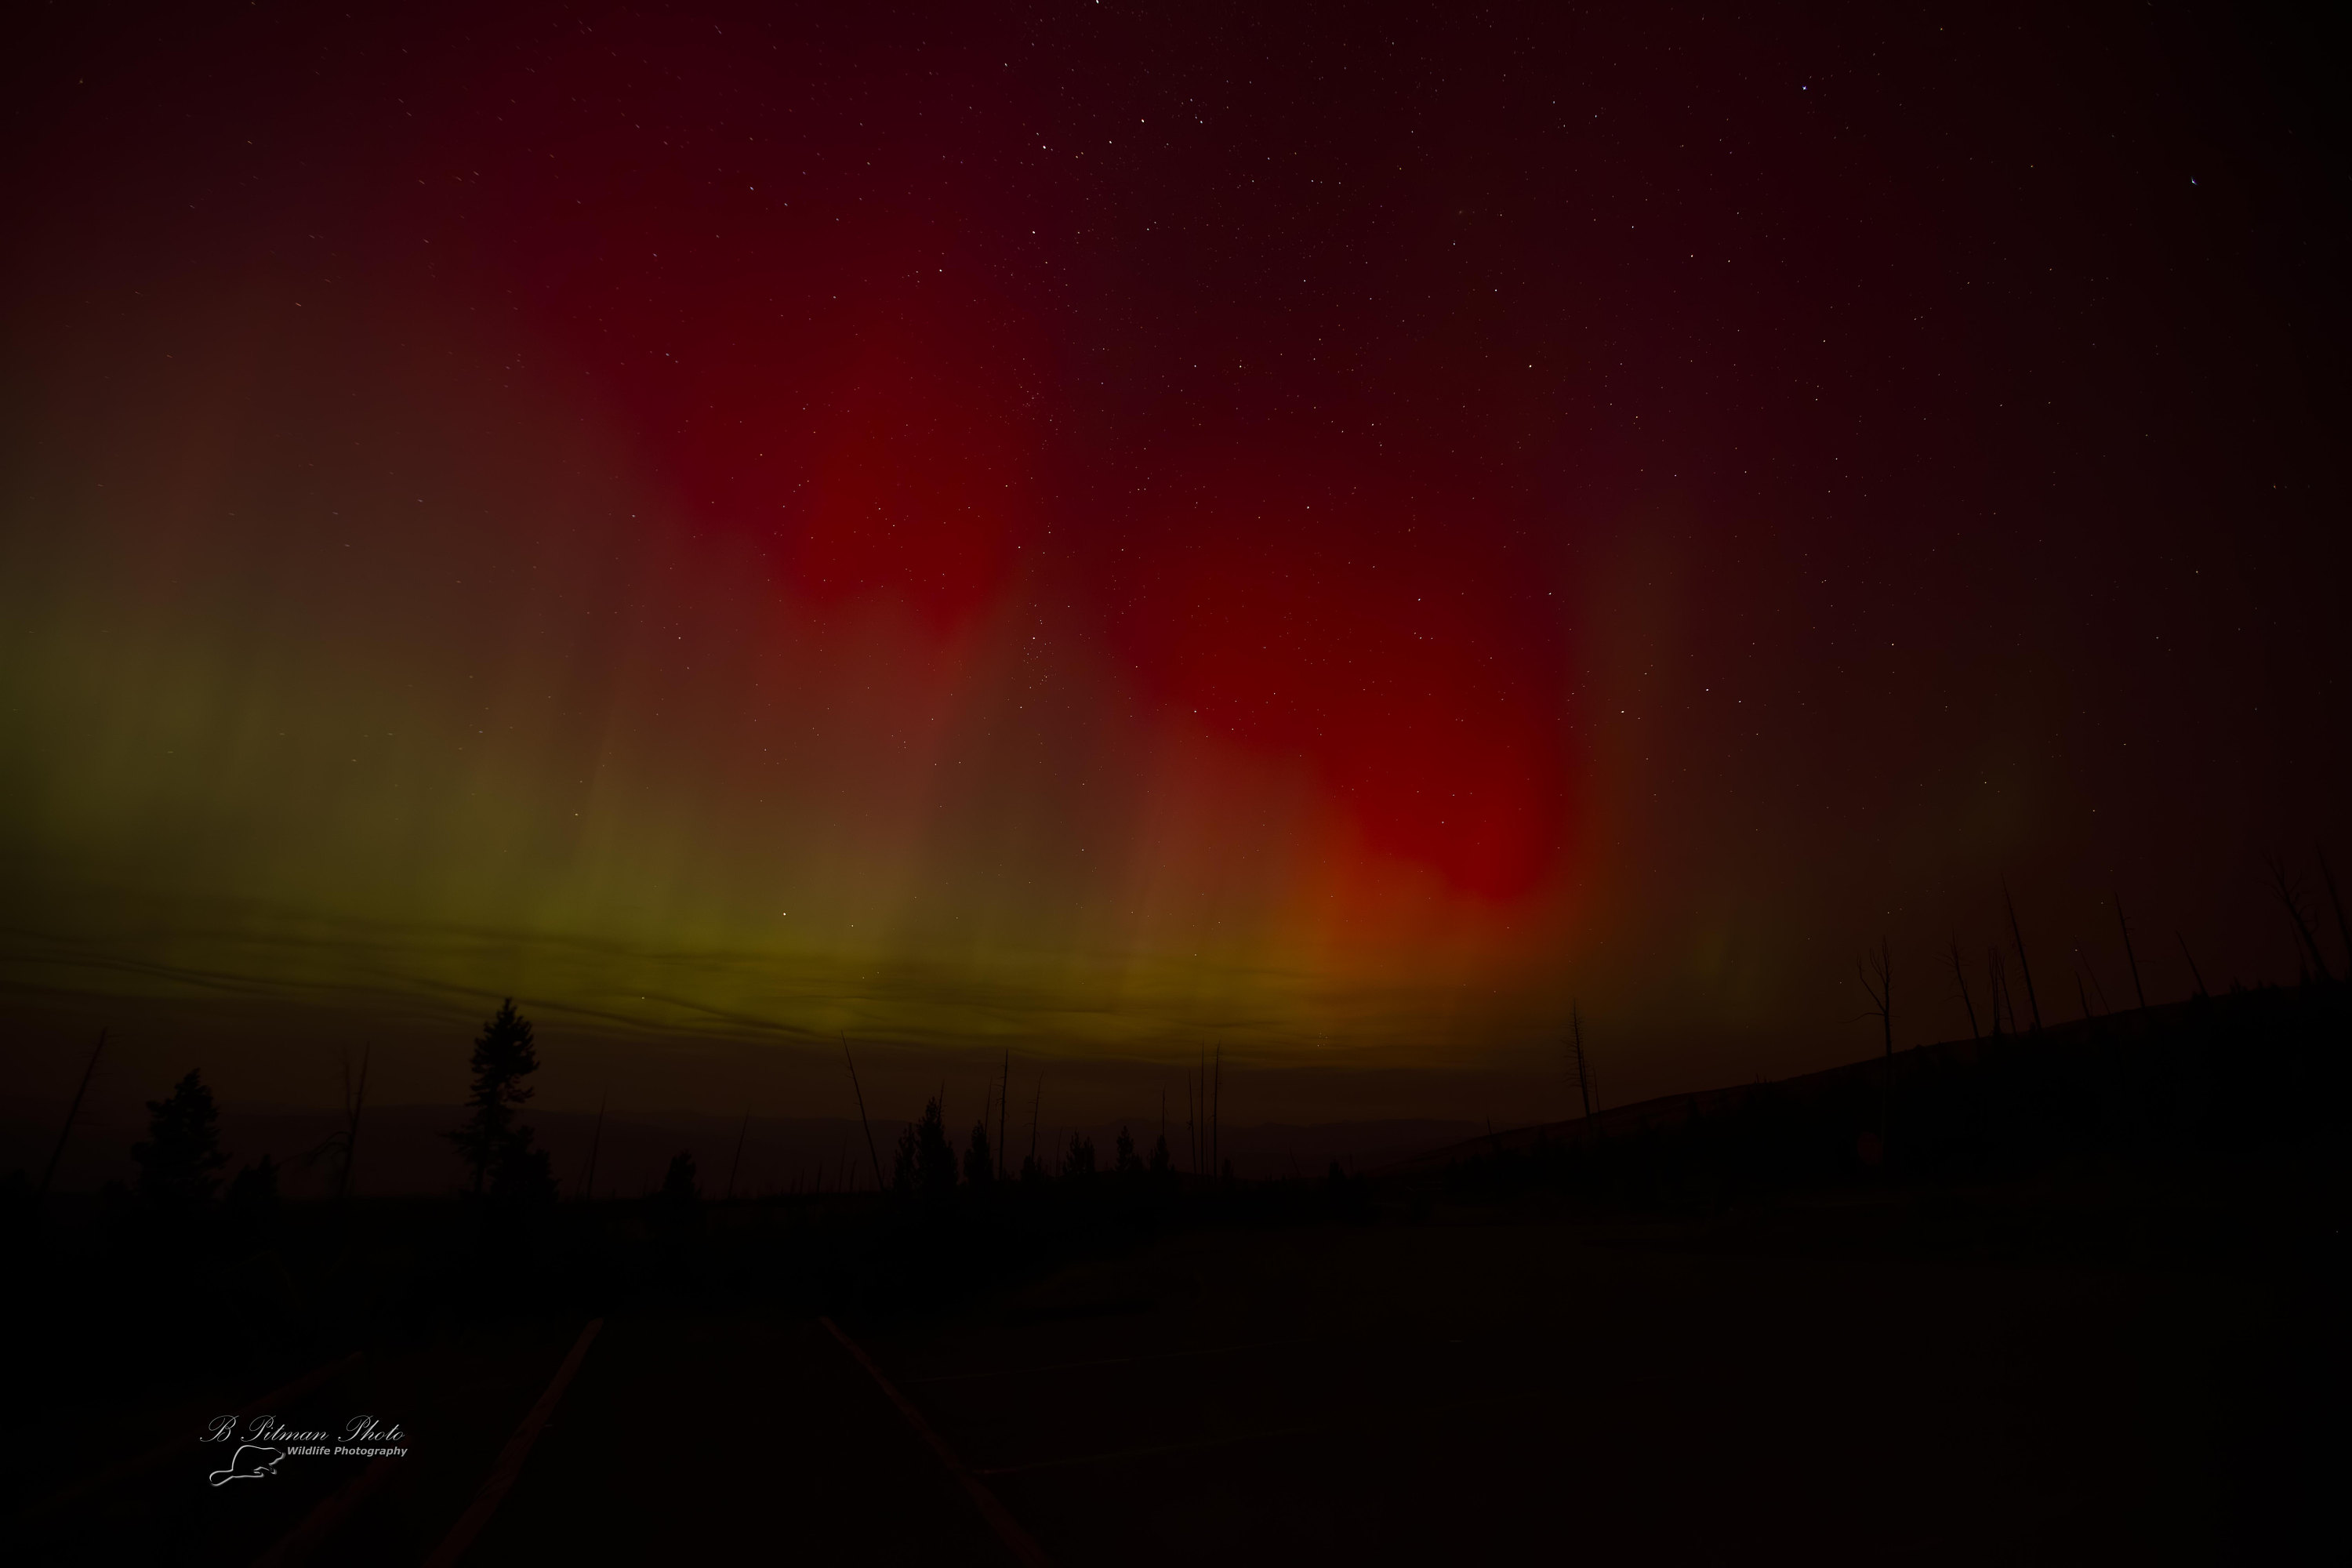
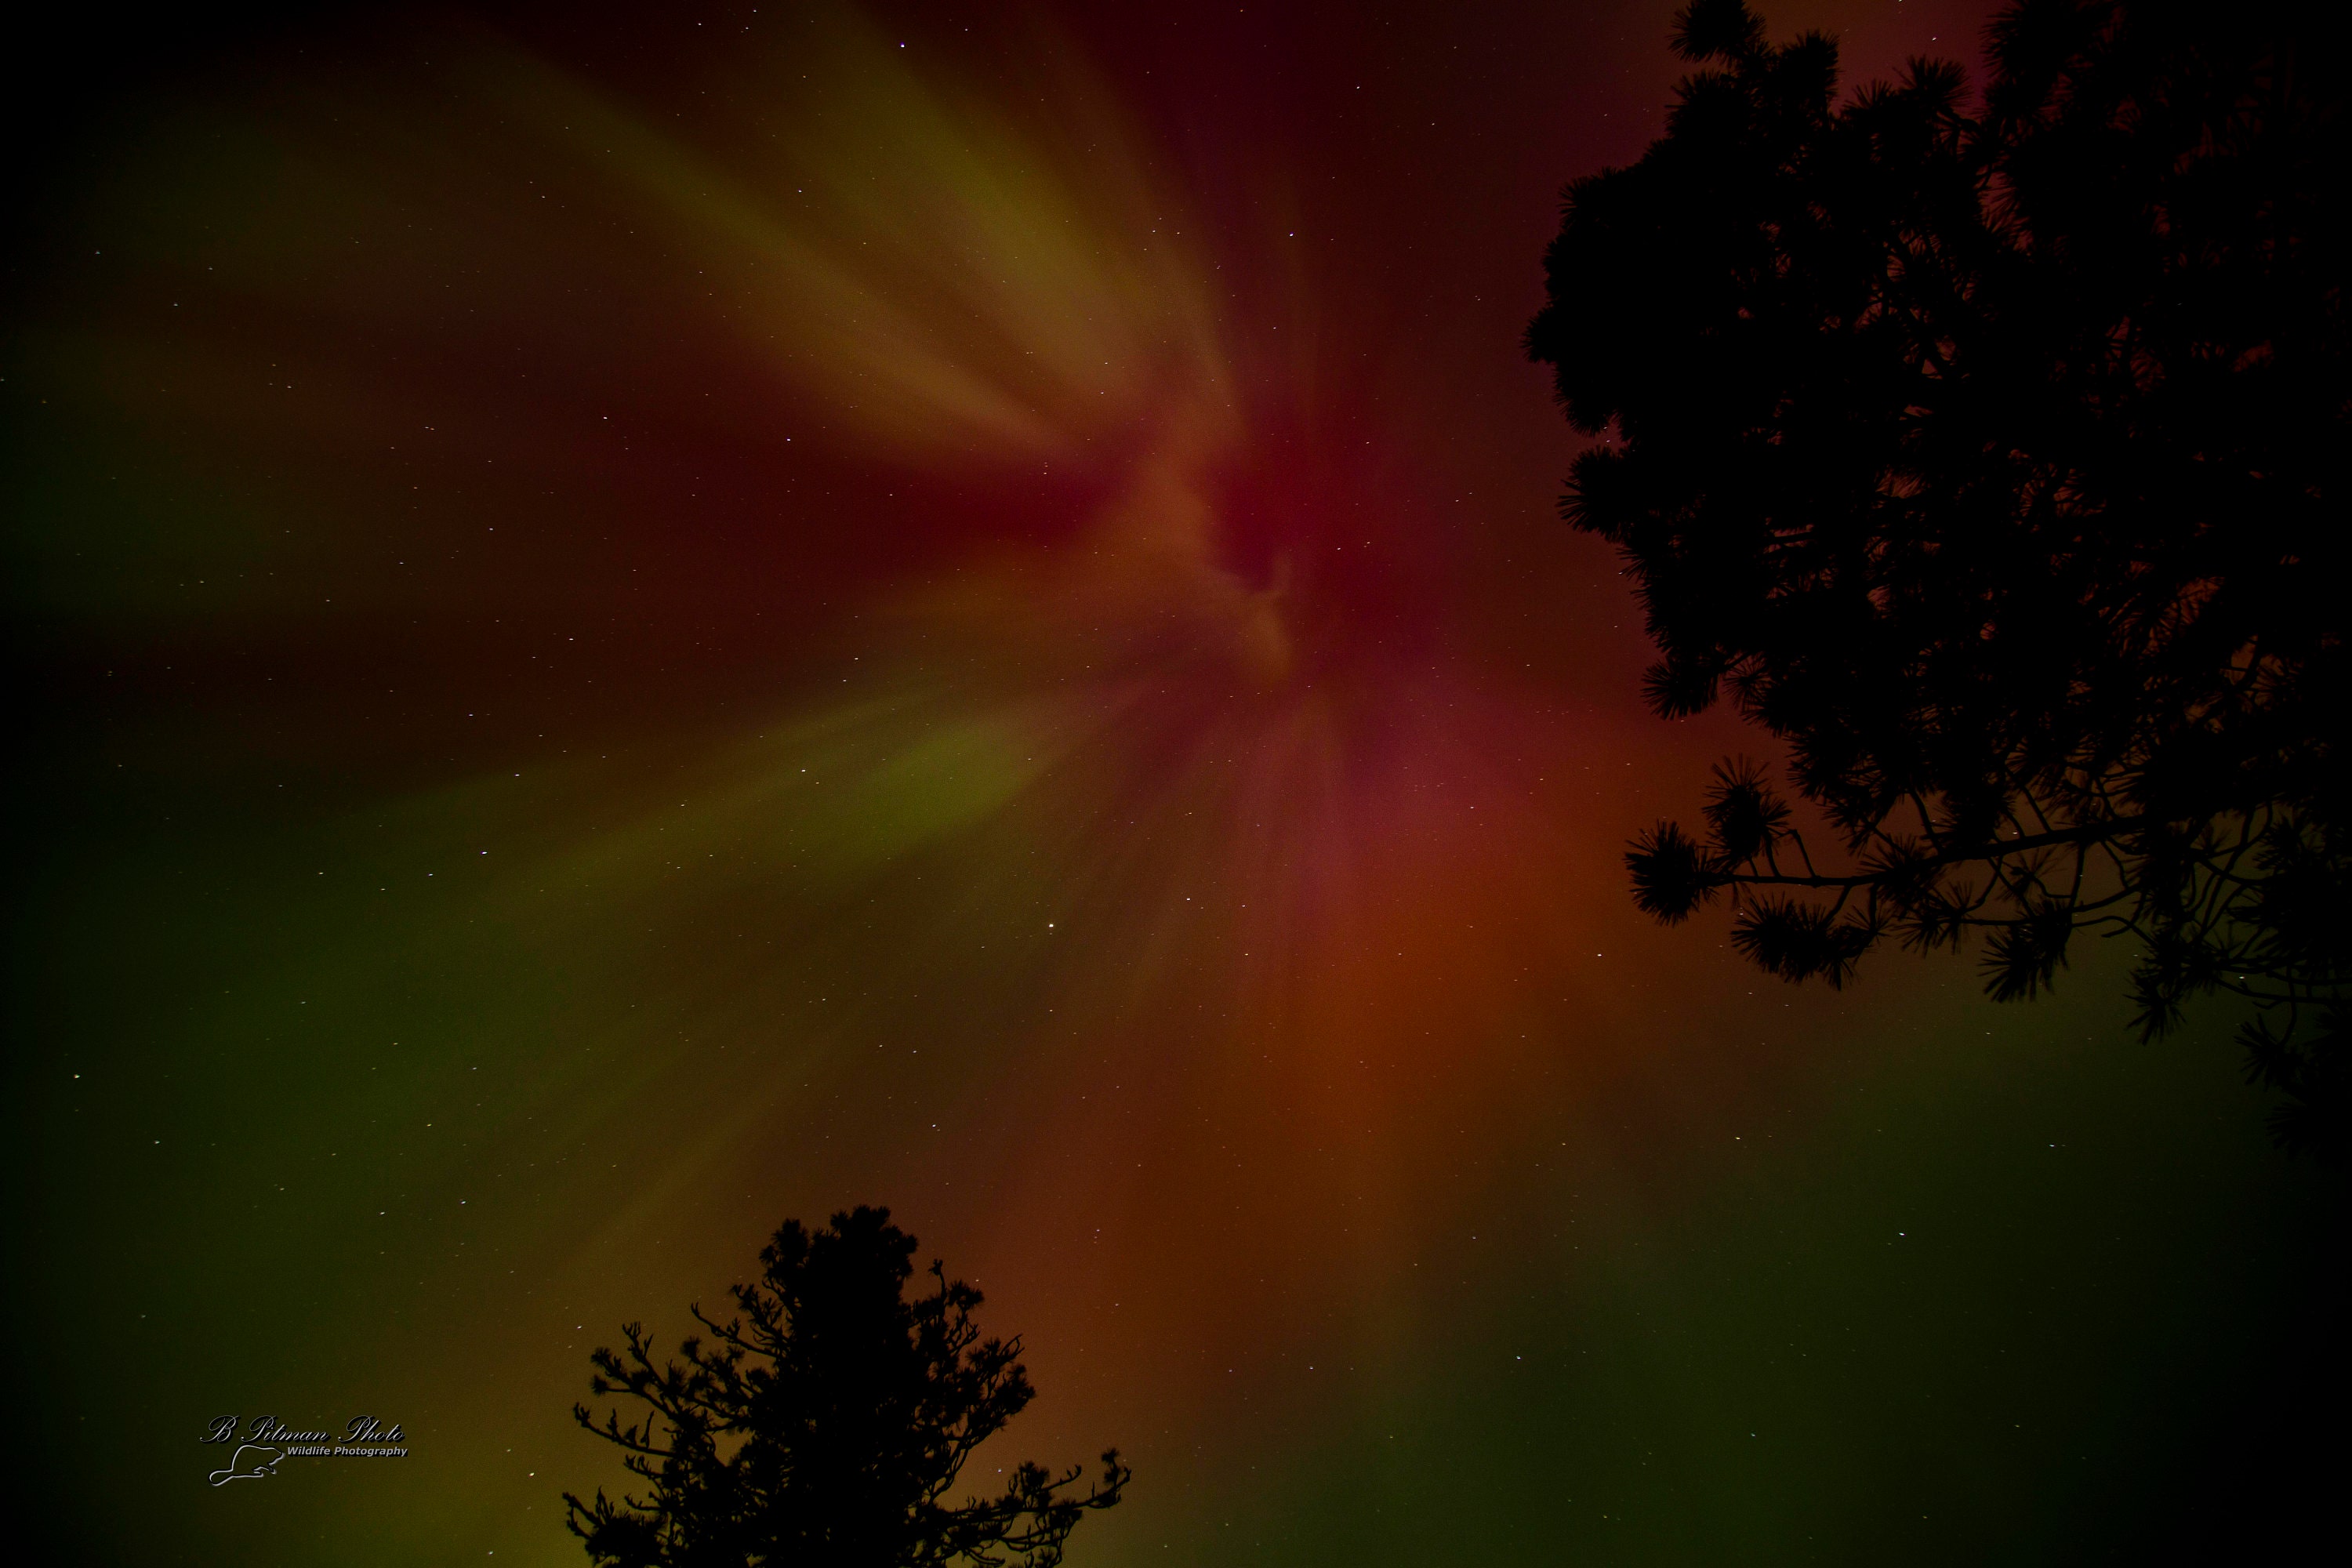
August 11th Aurora on Dunraven Pass, Yellowstone National Park, No Color Adjustments.
Photo Editing
I want to touch on this subject as it is very important to me and I am still developing my processing technique. Originally I set out to do everything in Camera, thru control of the settings provided in the camera. Over time as I realized the benefits of processing the photos to remove grain, adjust exposure level, bump up the color vibrance and saturation I slowly began experimenting with my photo editing. I had multiple discussions with professional photographers, all of whom use some variety of Lightroom, Capture One, DPP4, and Topaz AI to denoise, adjust and refine their photographs into stunning captures. Despite this it wasn't until I had a conversation with my brother's former roommate and friend Dave regarding Ansel Adams manipulating his images in the darkroom, and the works of Jerry Uelsmann that I really felt that making adjustments in post processing was not "cheating". Photo manipulation did not start with Adobe but had long but part and parcel of photographic artwork.
With this in mind I wanted to keep my photos true to the scene I captured so have attempted to limit my adjustments to denoise, exposure adjustments and some vibrance/saturation adjustments to bring out the natural colors. I have experimented with utilizing AI sharpening and other adjustments but prefer the photos I have taken where there is no need to sharpen or use other enhancements.
Aurora Photo Comparisons
Searching thru other photos of the Aurora I rarely ever saw the color varieties that I was capturing. So I began researching the settings others typically use to capture the aurora, and the aurora itself to better understand why I was seeing a color variety that did not match the rest of the photographic world. With only having experienced limited occurences of color to the naked eye in Montana, primarily on May 10th (yellow/green with reds/magenta), and August 11th (red/magentas) I started to question the color spectrum I was capturing. Thru research I started to realize that based on my latitude and the long exposures I was using to bring out the color of the Aurora I was likely taking pictures of the upper Aurora where Oxygen emits red wavelength light. As some of the photos had green/yellow hues I was satisfied with this answer and believed my settings to still be accurately capturing the Aurora I "couldn't" see from my latitude.
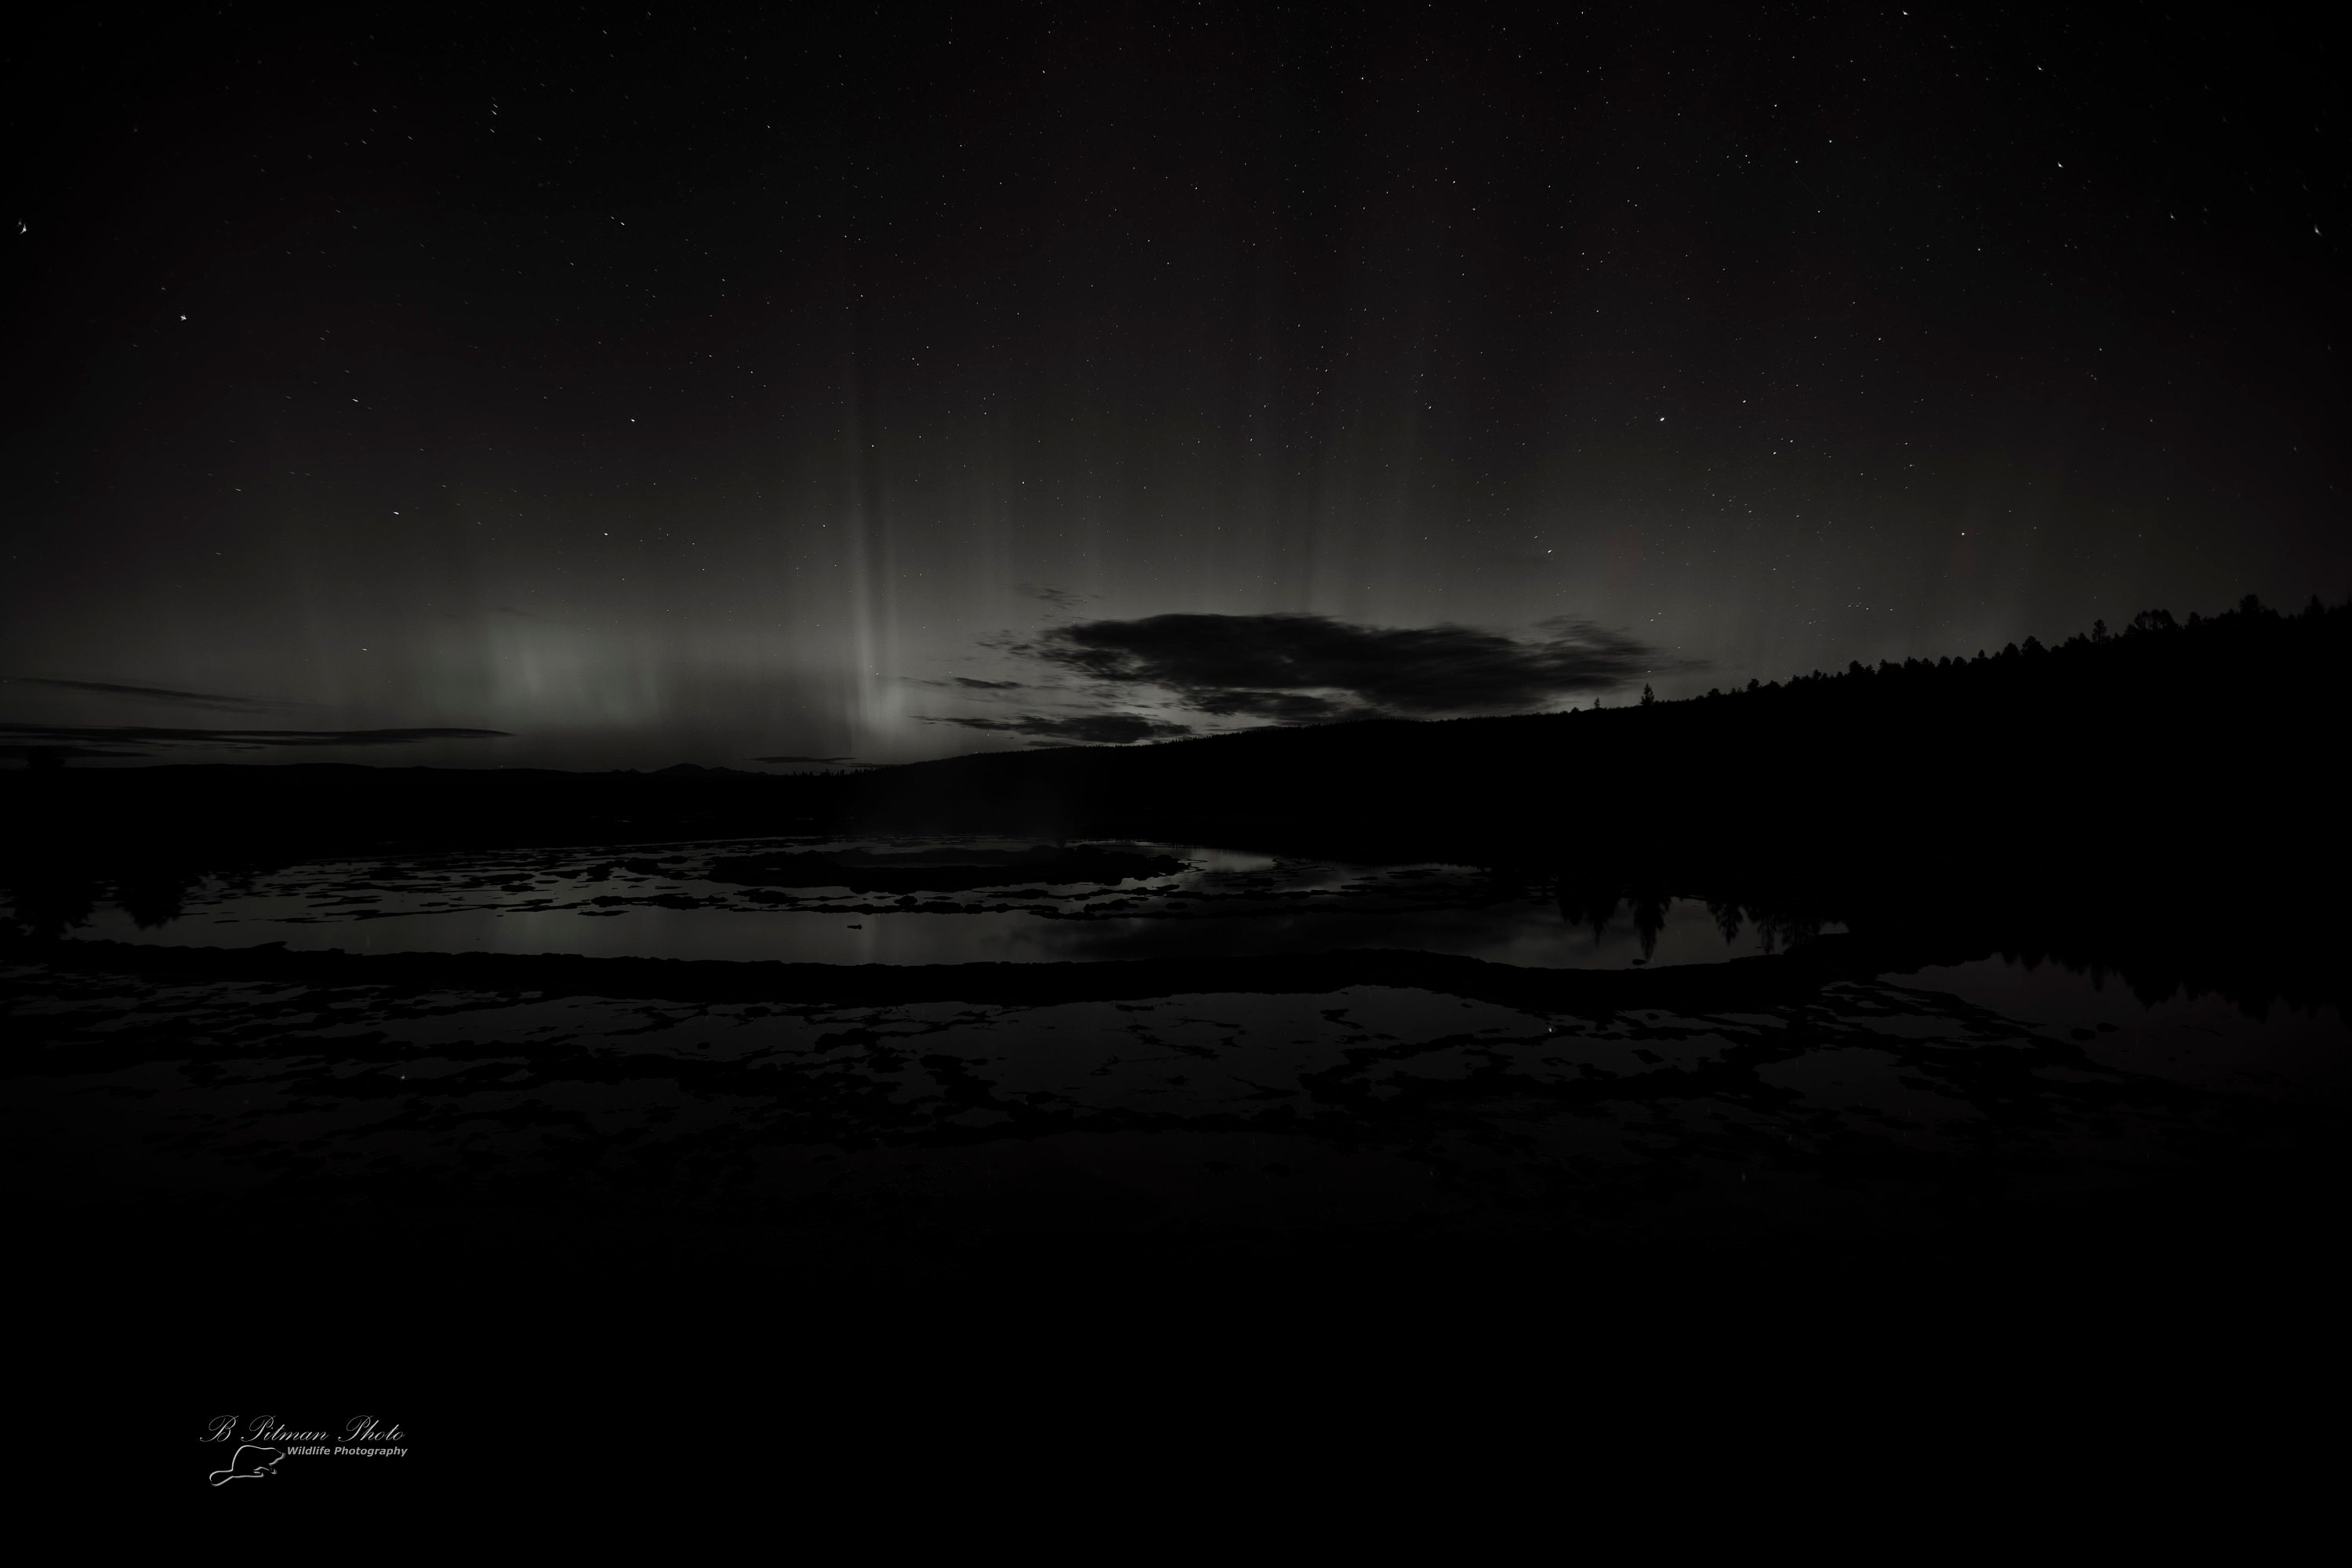
Most nights when I photographed the Aurora I could see a pale white glow, with occassional pillars as in the desaturated, and exposure reduced editted photo below:
August 27th thru 31st
On August 27th I set out to find and photograph a bull elk in Yellowstone National Park. You would think this would be easy with the onset of the rut, but I had been hoping to see one during my travels all summer and had not seen a browtined bull since very early in the year. Unfortunately, I did not find one and returned to my camper disappointed. As I arrived my Aurora notification application notified me of a high KP and a 3% possibility of seeing the Aurora at my location. Unprepared and unplanned I returned to White Dome Geyser to setup my camera to attempt to capture the Aurora. Once I had setup my 5DMIV and 24mm-70mm Sigma combination at White Dome I decided to return to Great Fountain to setup my 5DS and 16-35mm Canon lens to capture both locations on the same night. I did my near normal setup on both cameras. though based on some star trailing I had found in a couple of my other captures, I used a rule of 250, rather than 500 (halved my exposure time for each lens) and increased my now typical ISO from 1600 to 3200 to compensate for the shorter exposure.
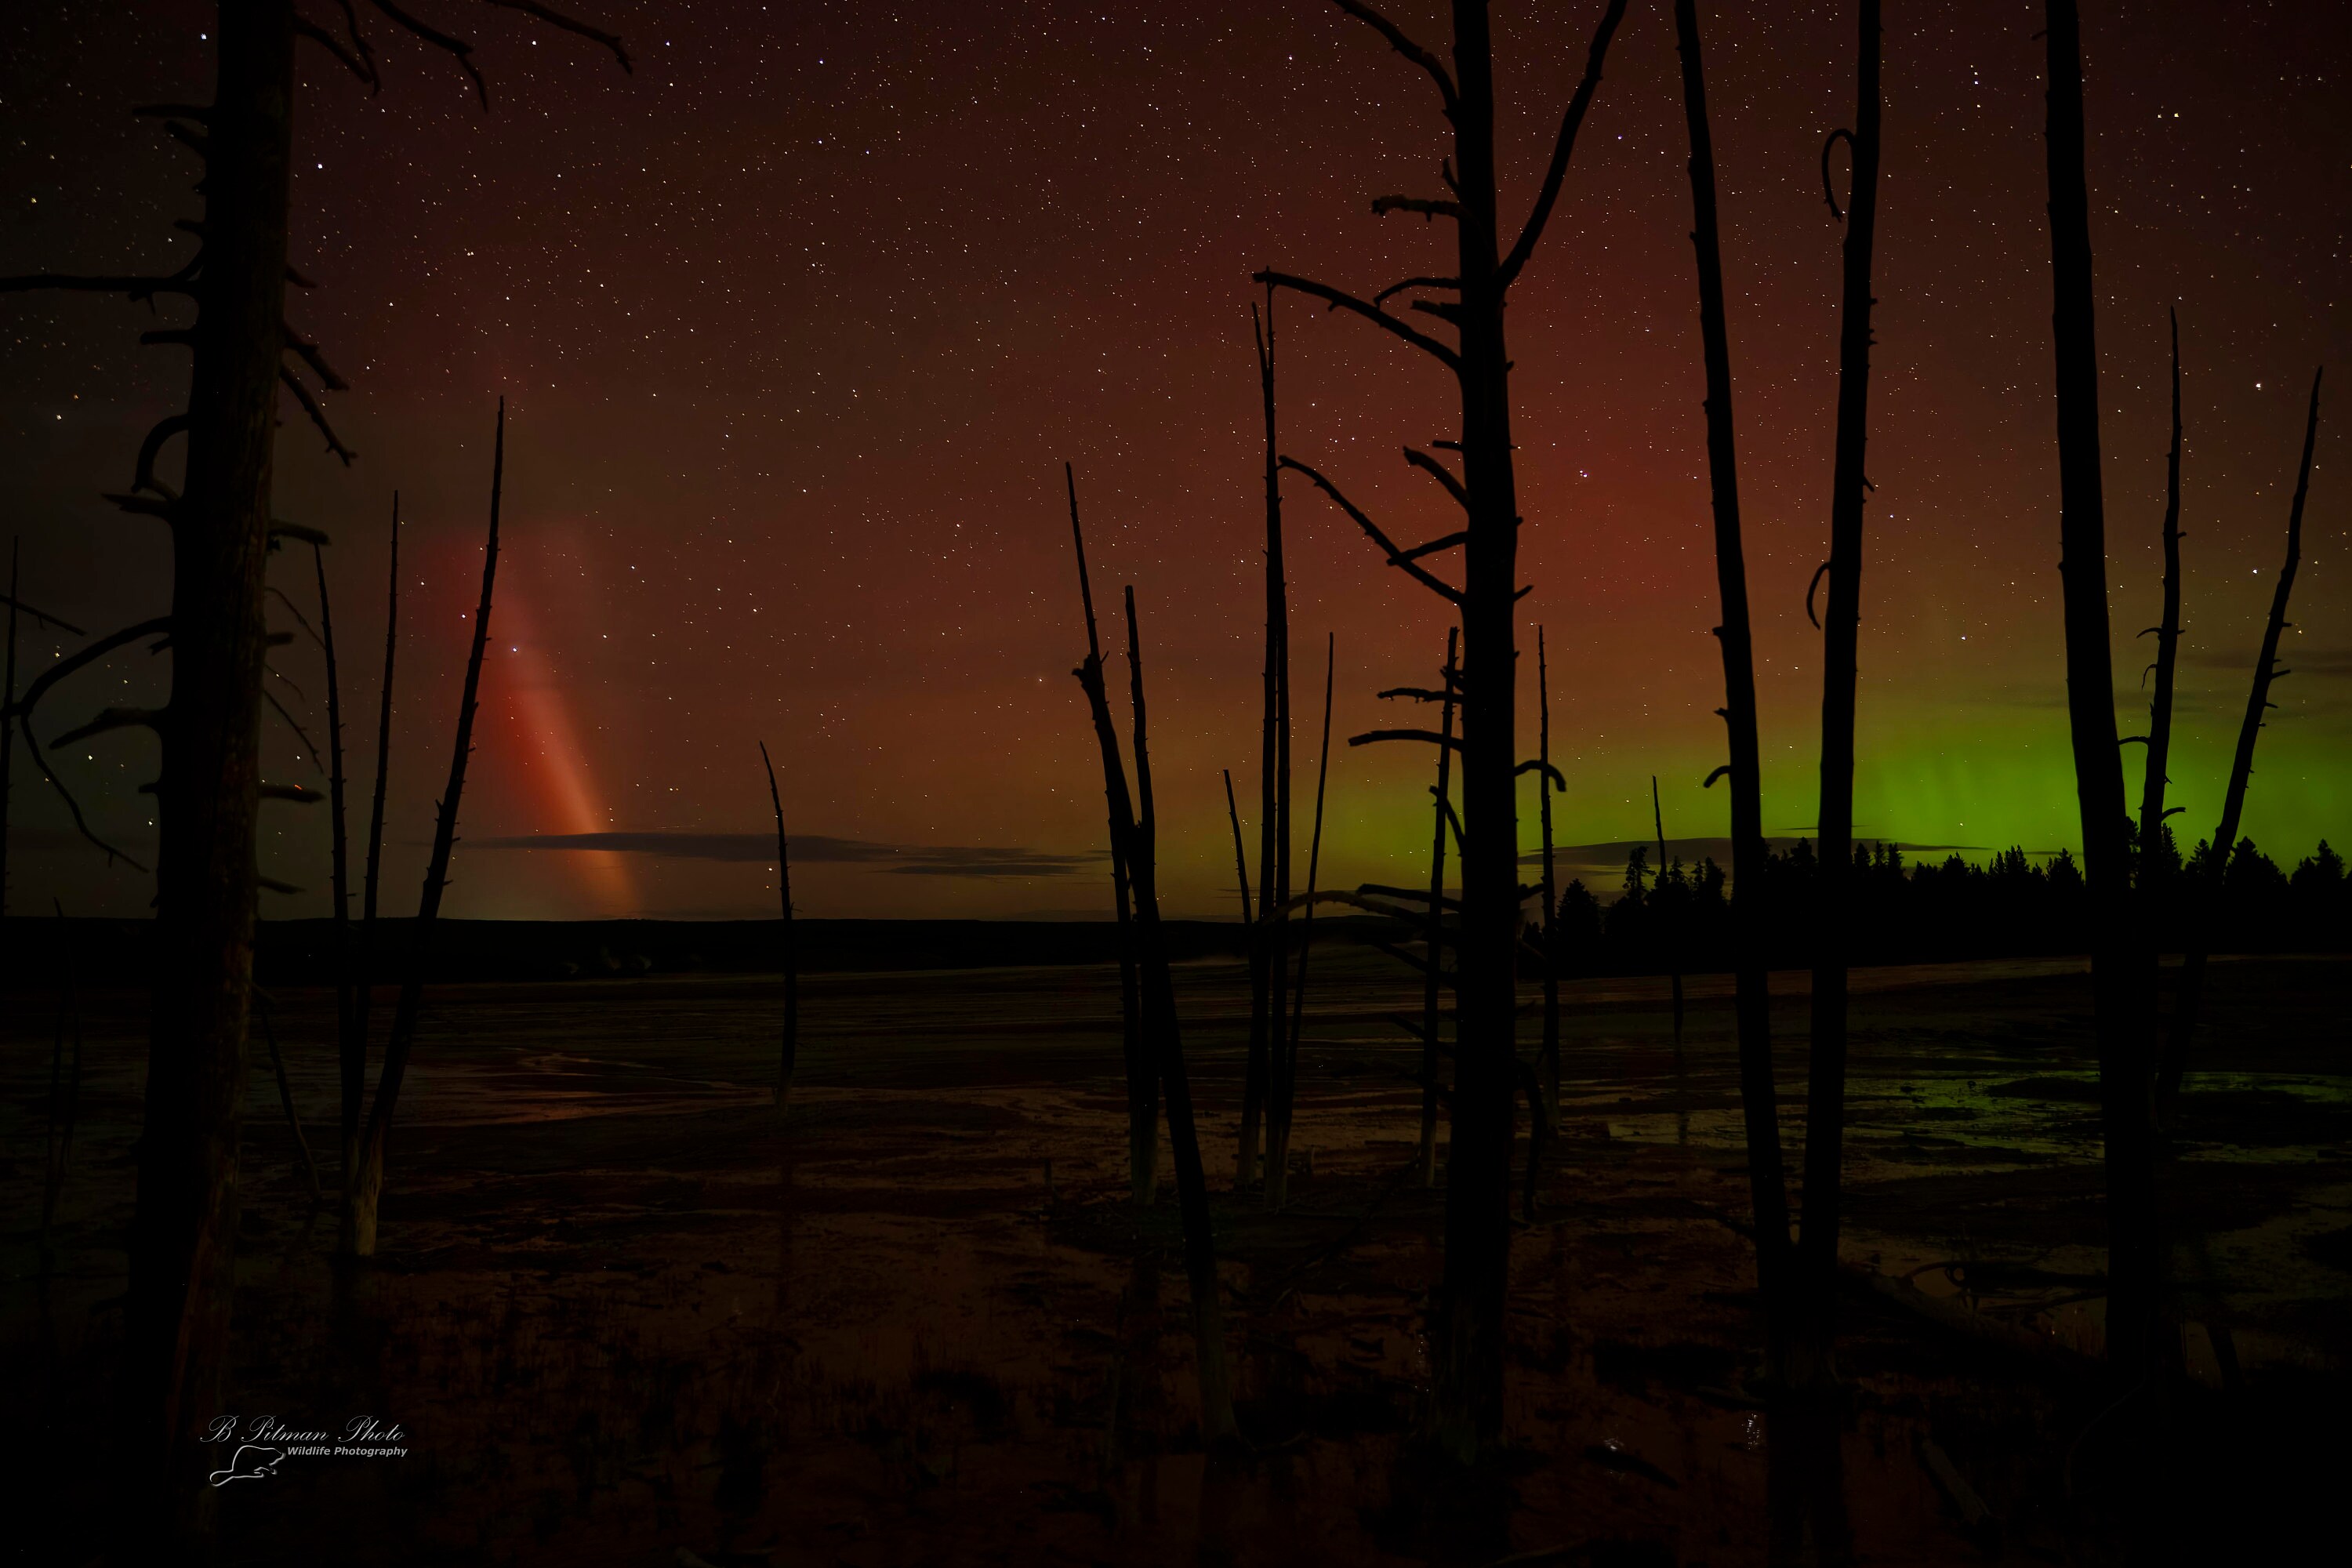
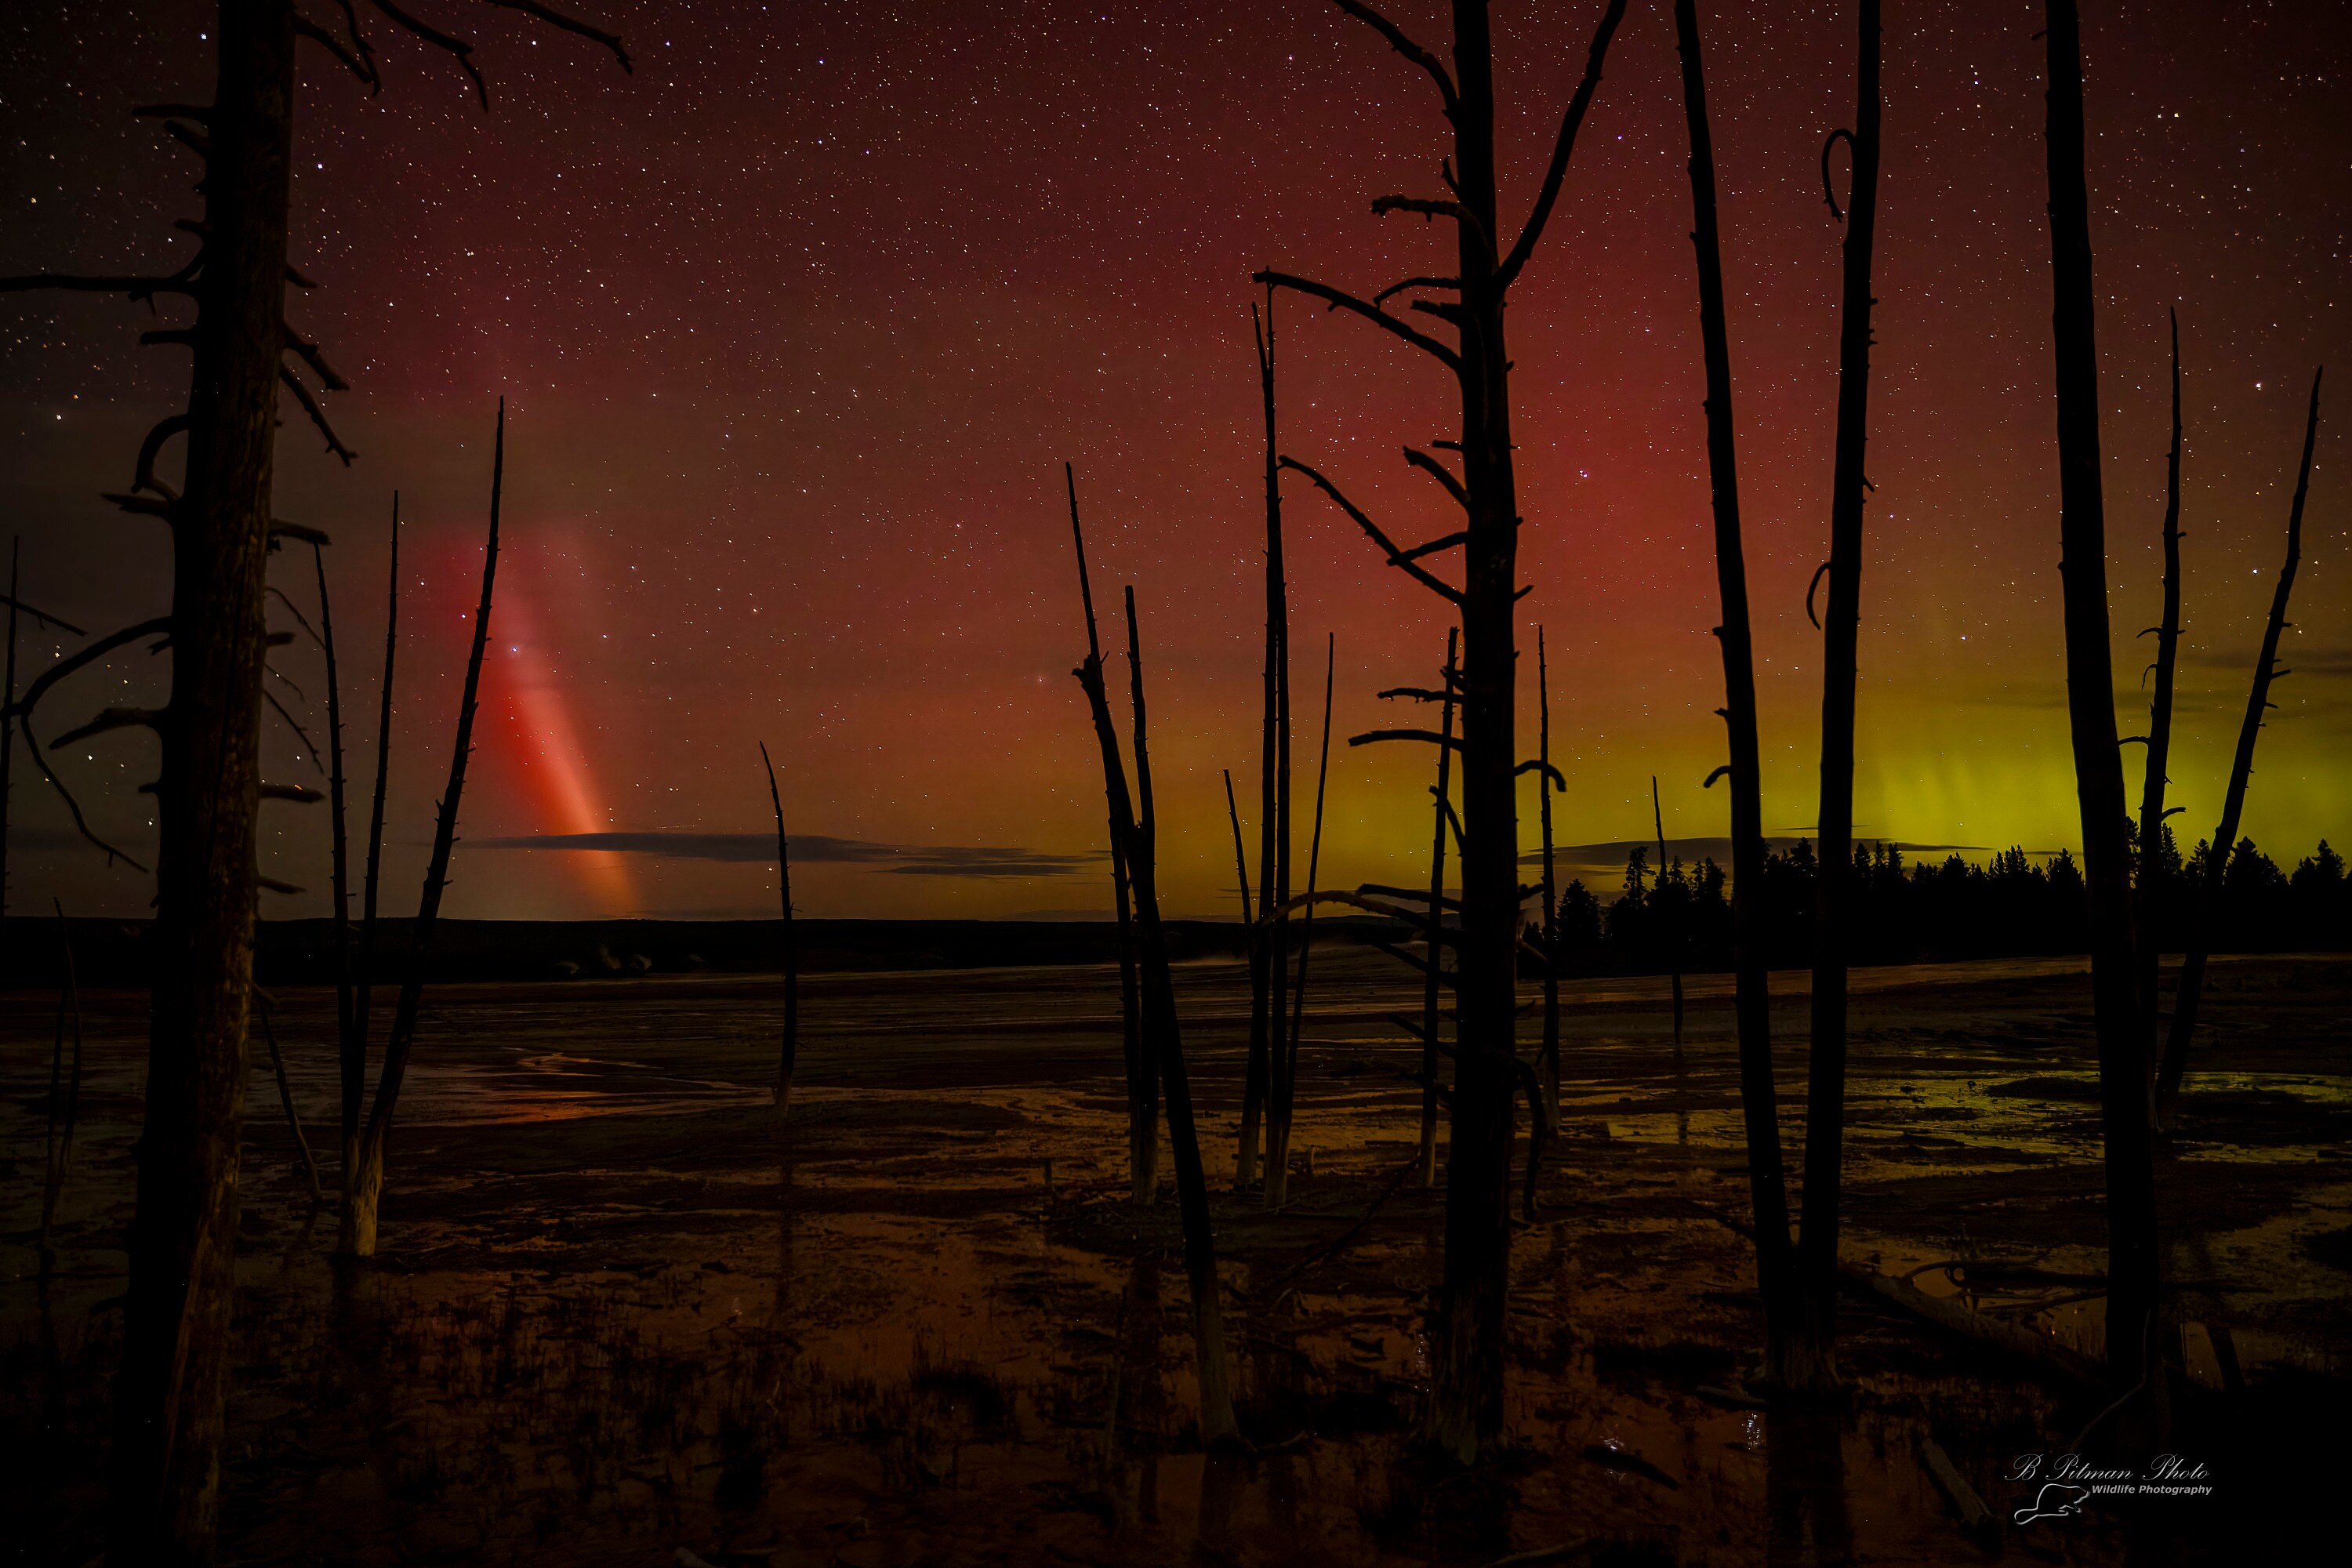
I sat back and allowed the intervelometer to take photos as I watched the aurora with my naked eye. When I saw numerous white light pillars and a strong glow I was excited and knew that these photos would turn out well. During this time I decided to not run a "terminal time lapse" and to make an effort to capture the aurora above the bobby socks trees at the nearby Fountain Paint Pots on the same night.
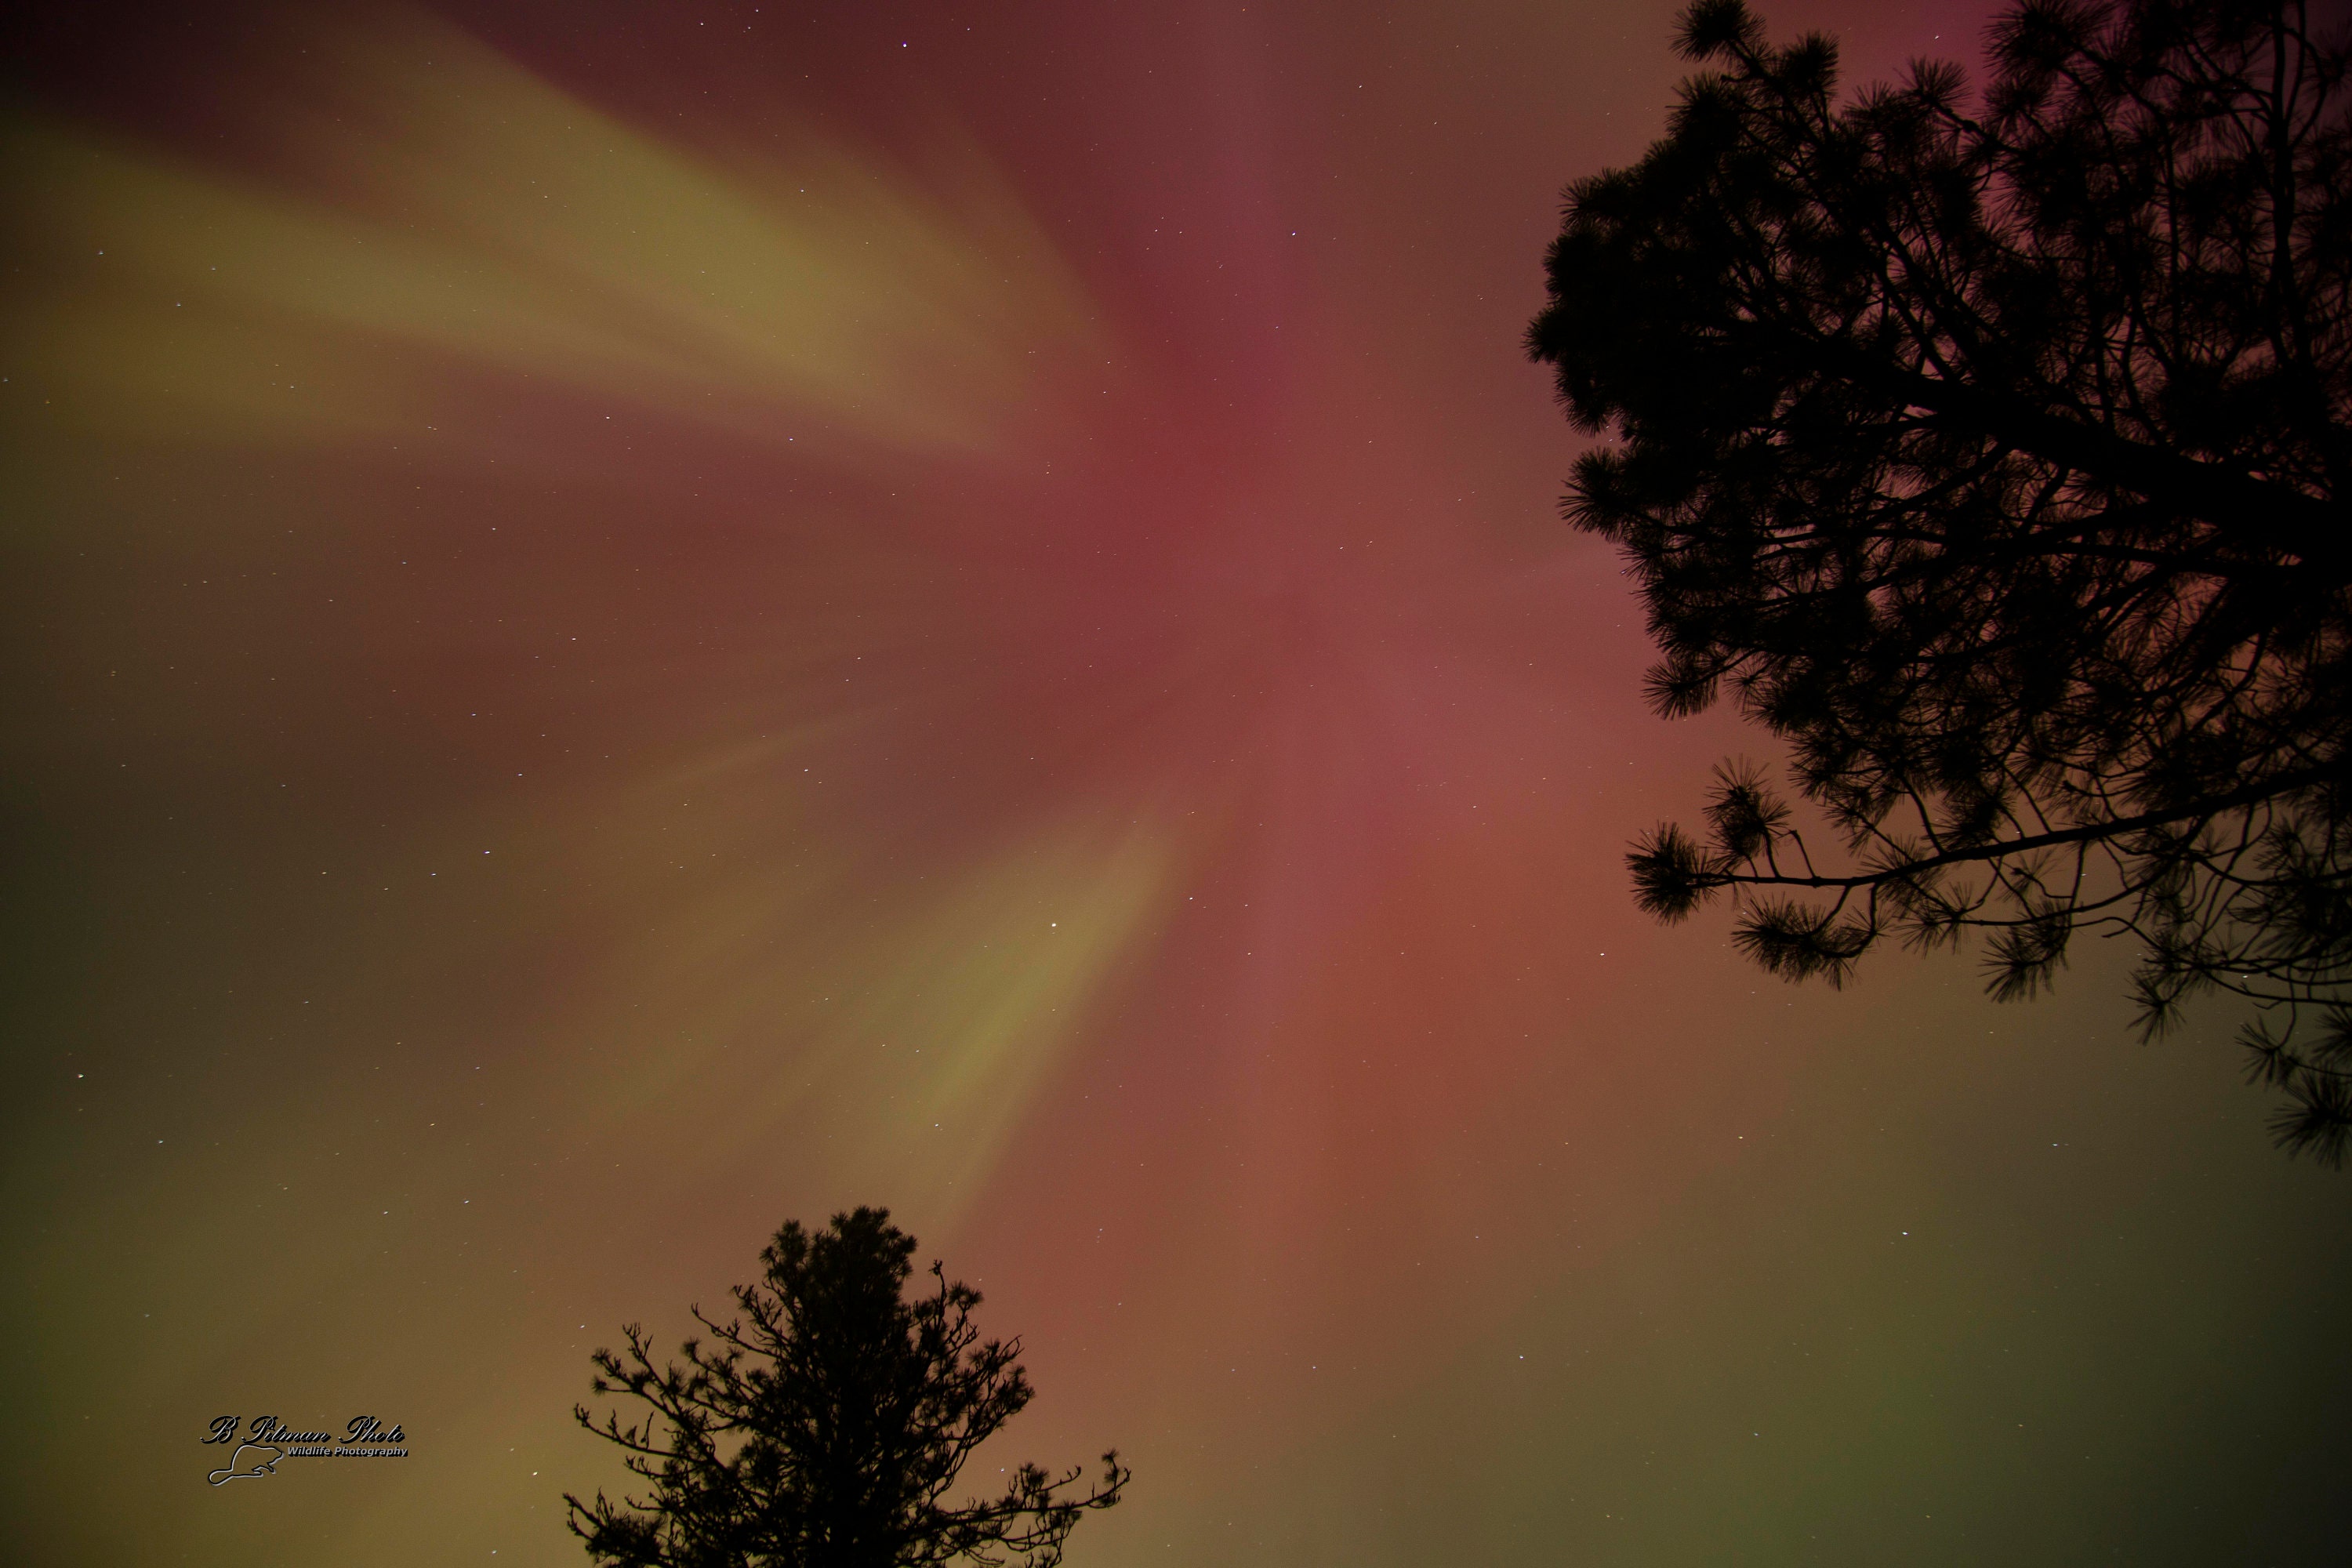
I was able to capture these photos with striking colors of red and yellow which I was impressed with. Without thinking I quickly processed them, adding slight bumps to exposure, vibrance and saturation (though in hindsight these were unneeded for these photos) and posted them to multiple Aurora and Yellowstone Facebook Groups. Part of me now wishes I hadn't, but it did lead to some growth and better understanding on my part.
Once posted I recieved a lot of compliments, wows, and everything I dreamed of, but several comments regarding "Manipulated colors", "fake" and other criticisms drew my attention. After all I knew I had not adjusted the colors captured in the camera, only denoised and bumped exposure, vibrance, and saturation. So why the hate, especially when some of it came from individuals with far, far more experience photographing the aurora in locations with lots of opportunity to see and photograph the aurora. As I dug into the criticisms wanting to improve my photography, I found that many felt my Neutral "Daylight" White Balance was incorrect, that a cooler White Balance between 3500K and 4000K was correct as it brings out the greens.
I found that hard to accept as the primary subject in all of these photographs IS light, and when photographing light itself, what could be more important than providing a neutral unbiased White Balance to capture the color, or cast, of light??? This led me further into reviewing color theory and the purpose and function of White Balance in photography. The more I researched these topics the more certain I was that Neutral White Balance was correct. But why the hate on the colors in my photos then? The Yellow. Red could be explained by the high altitude oxygen, which made sense because of my distance and latitude. Due to the curvature of the earth I was likely looking at the very top of the aurora, not the portion typically photographed in locations like Alaska, Iceland and Greenland. But the yellow is not a color that the aurora plasmas emit. Greens yes (low altitude oxygen), purples yes (middle to high altitude nitrogen), blue rare but yes (low altitude nitrogen), but yellow no way.
Until I struck upon the idea of colors mixing from an additive light theory perspective. Different from negative or pigments, when two light sources combine they produce a different color light. Yellow Light is a product of Red and Green Light. So due to my long exposure and the motion of the Aurora gases the green light was mixing so thoroughly with the red light that the green hue was lost leaving only the red and the mixed yellow.
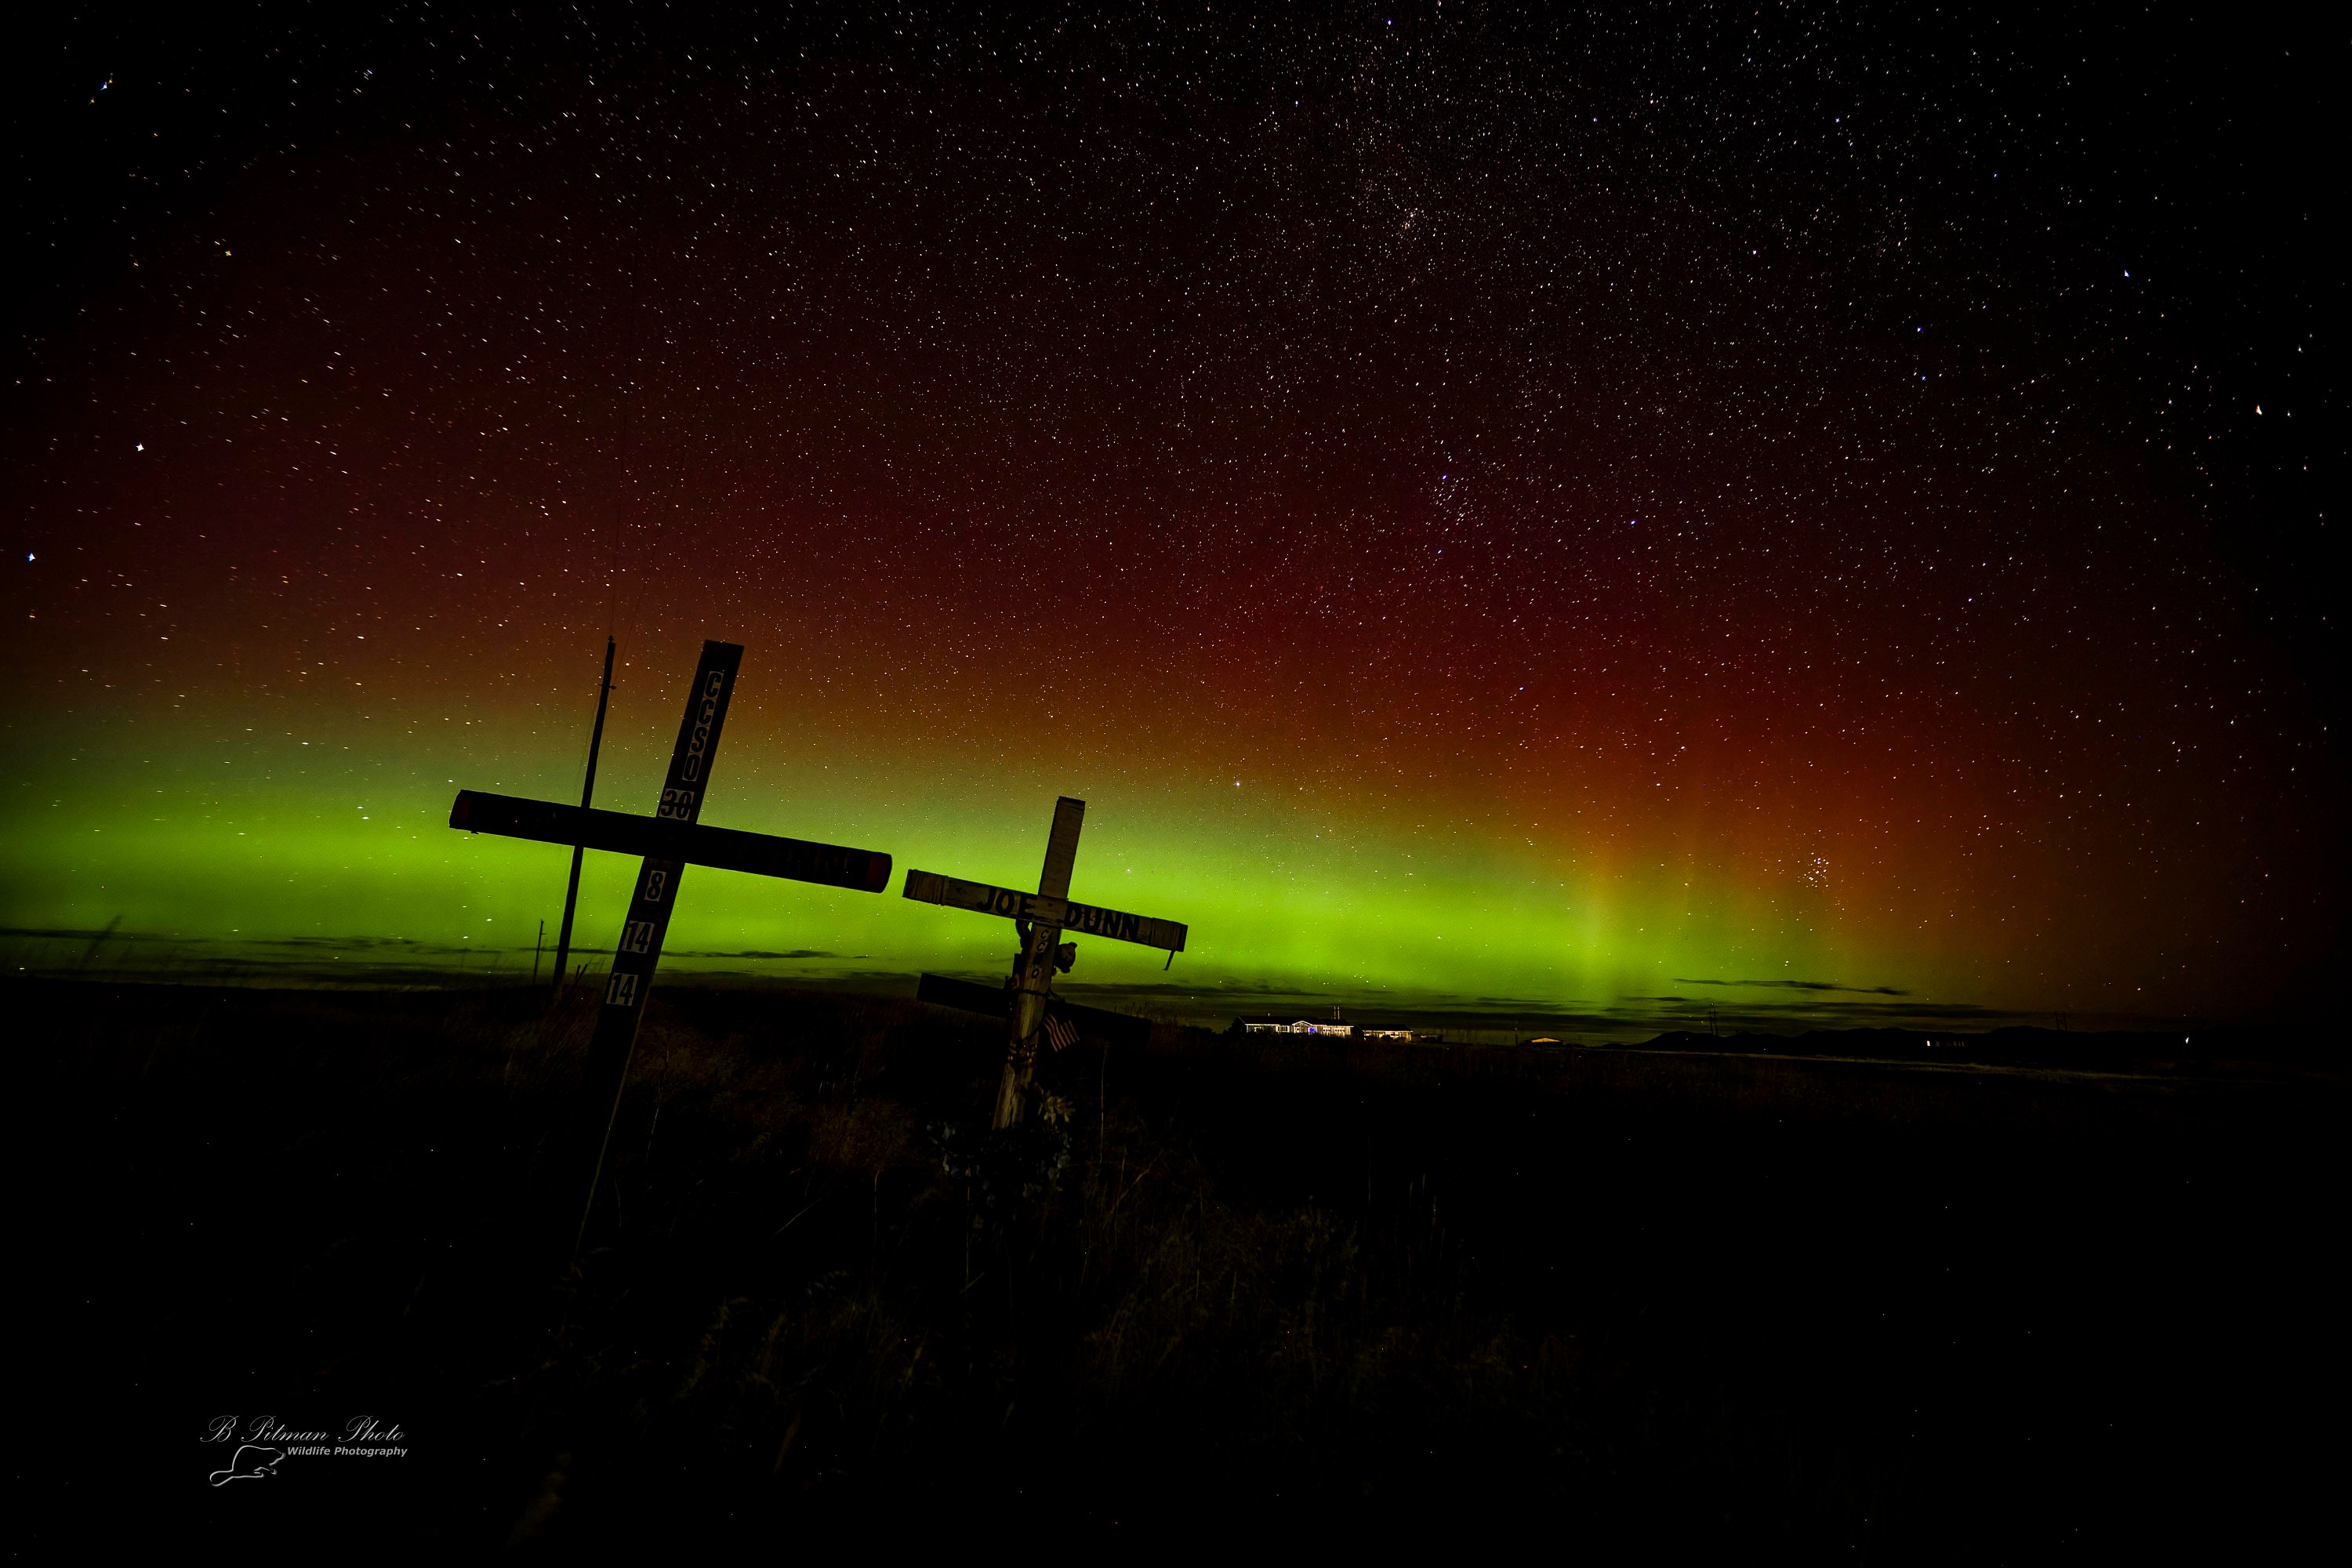
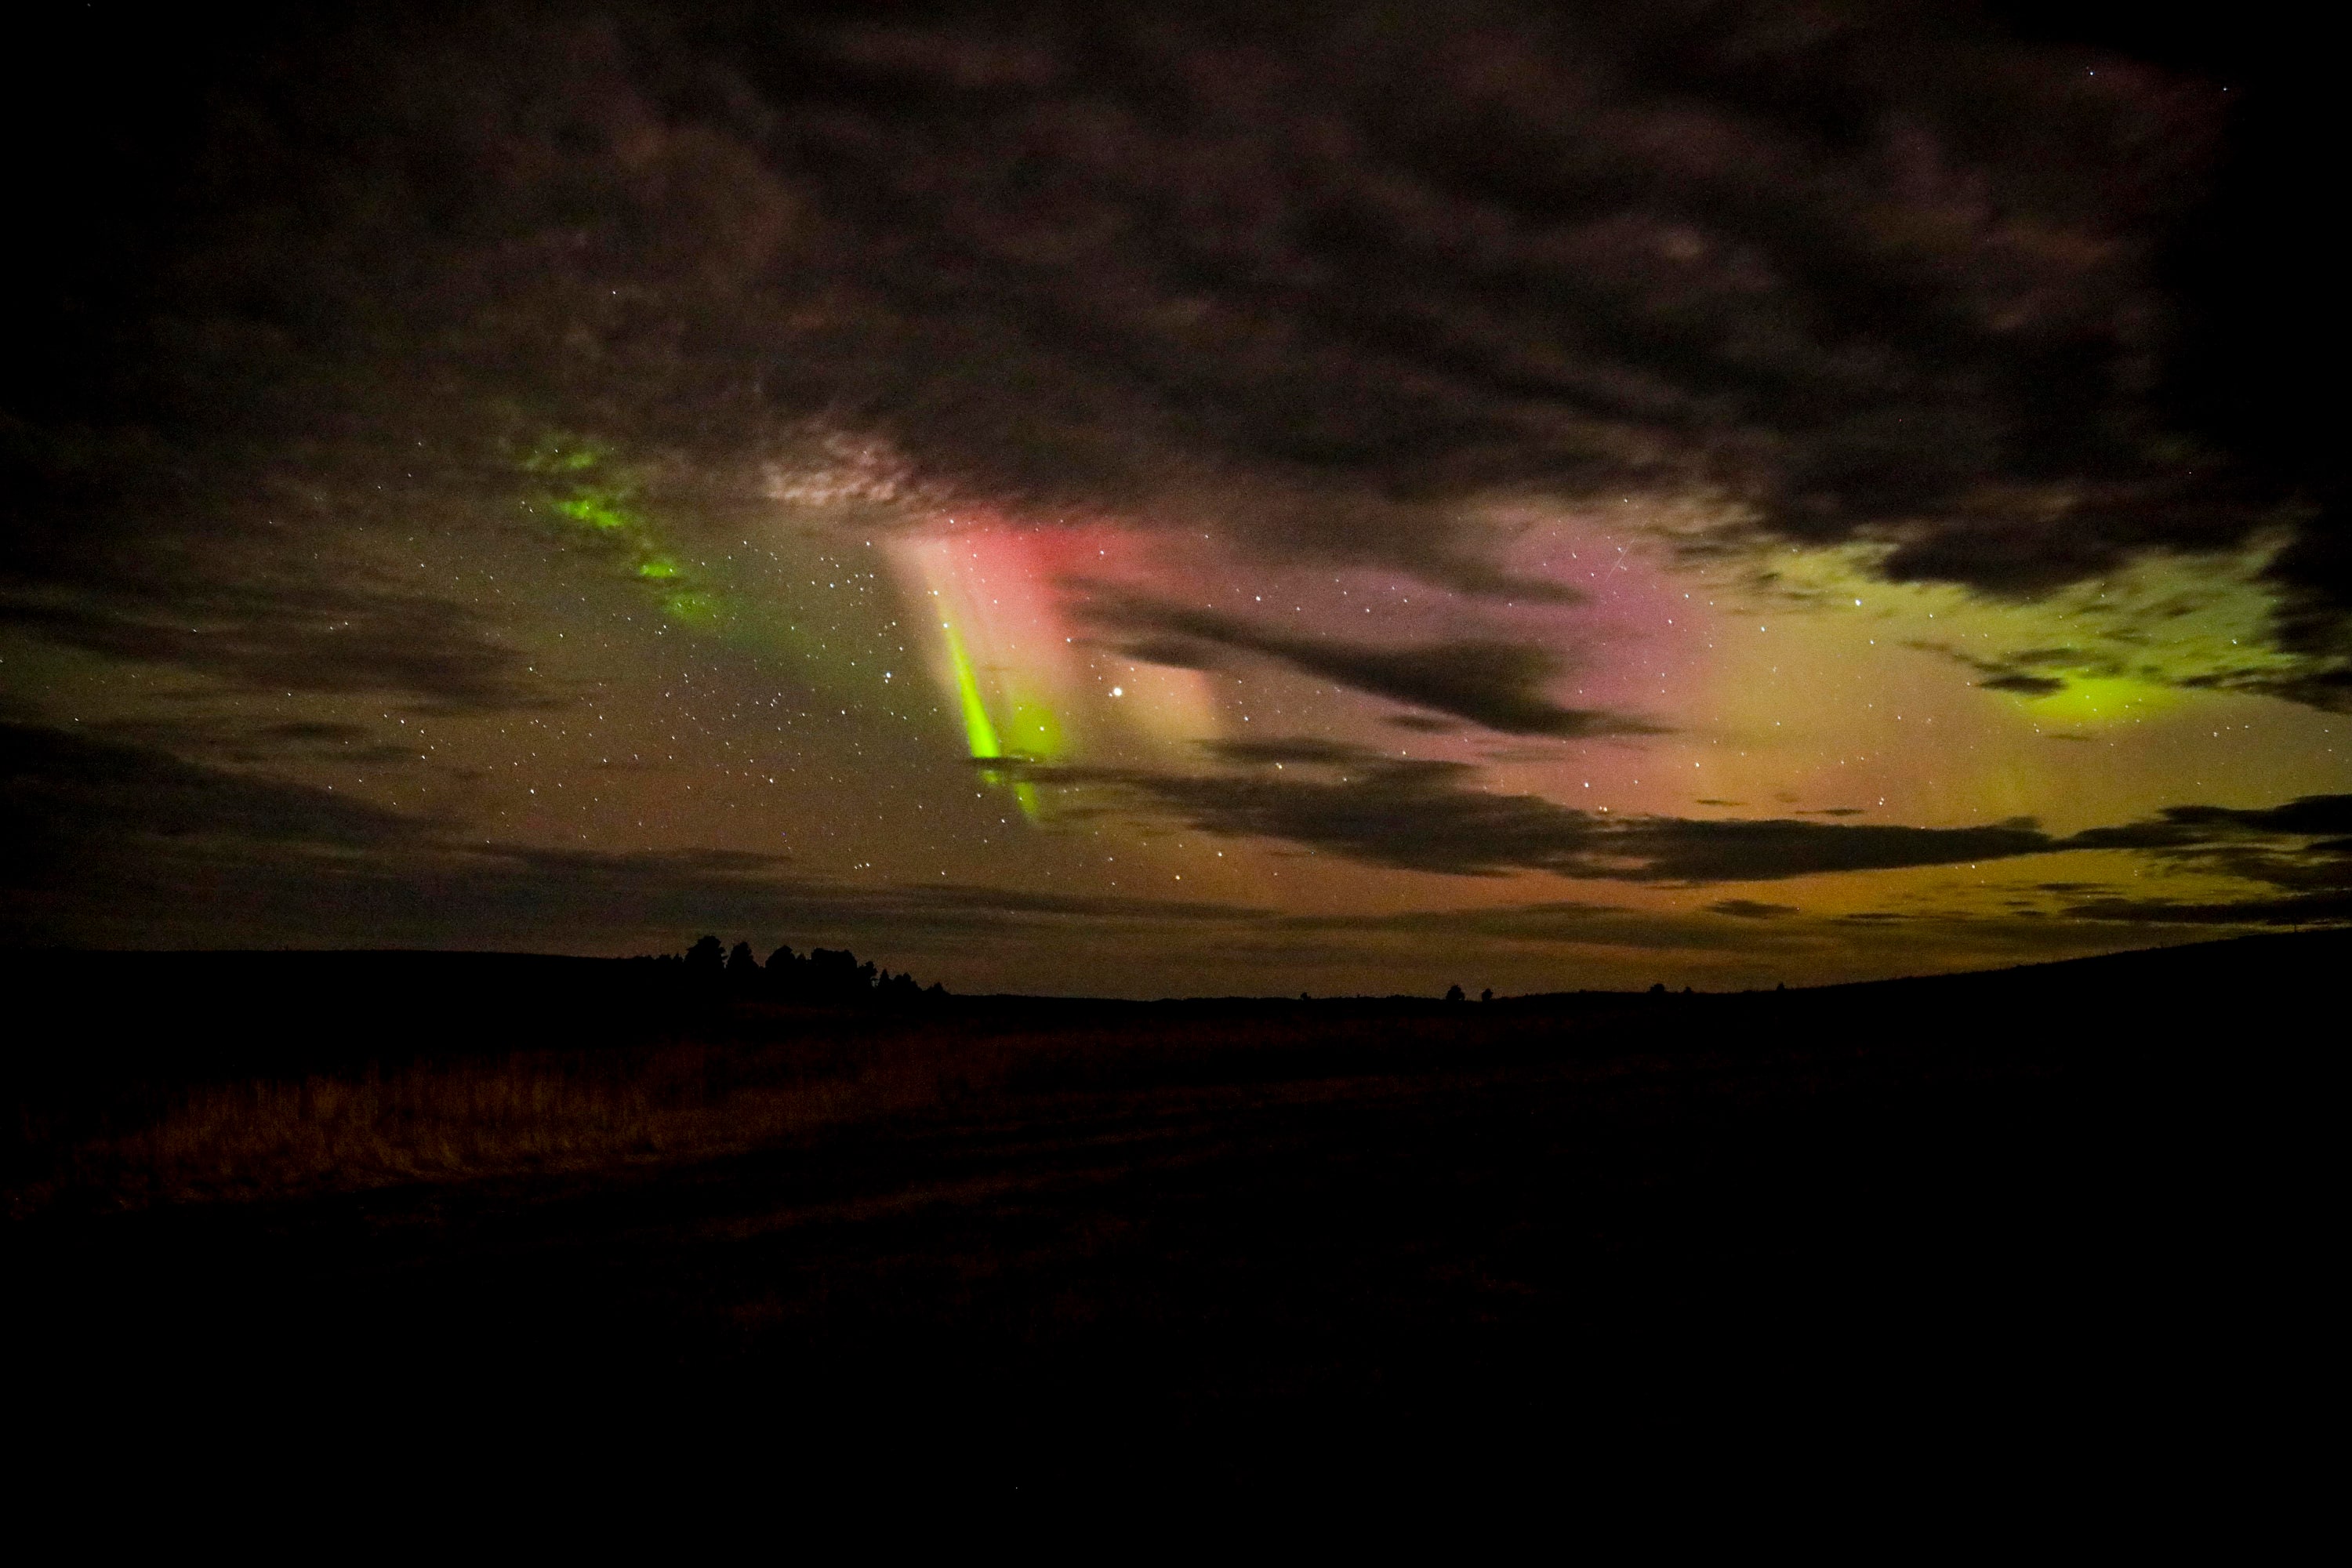
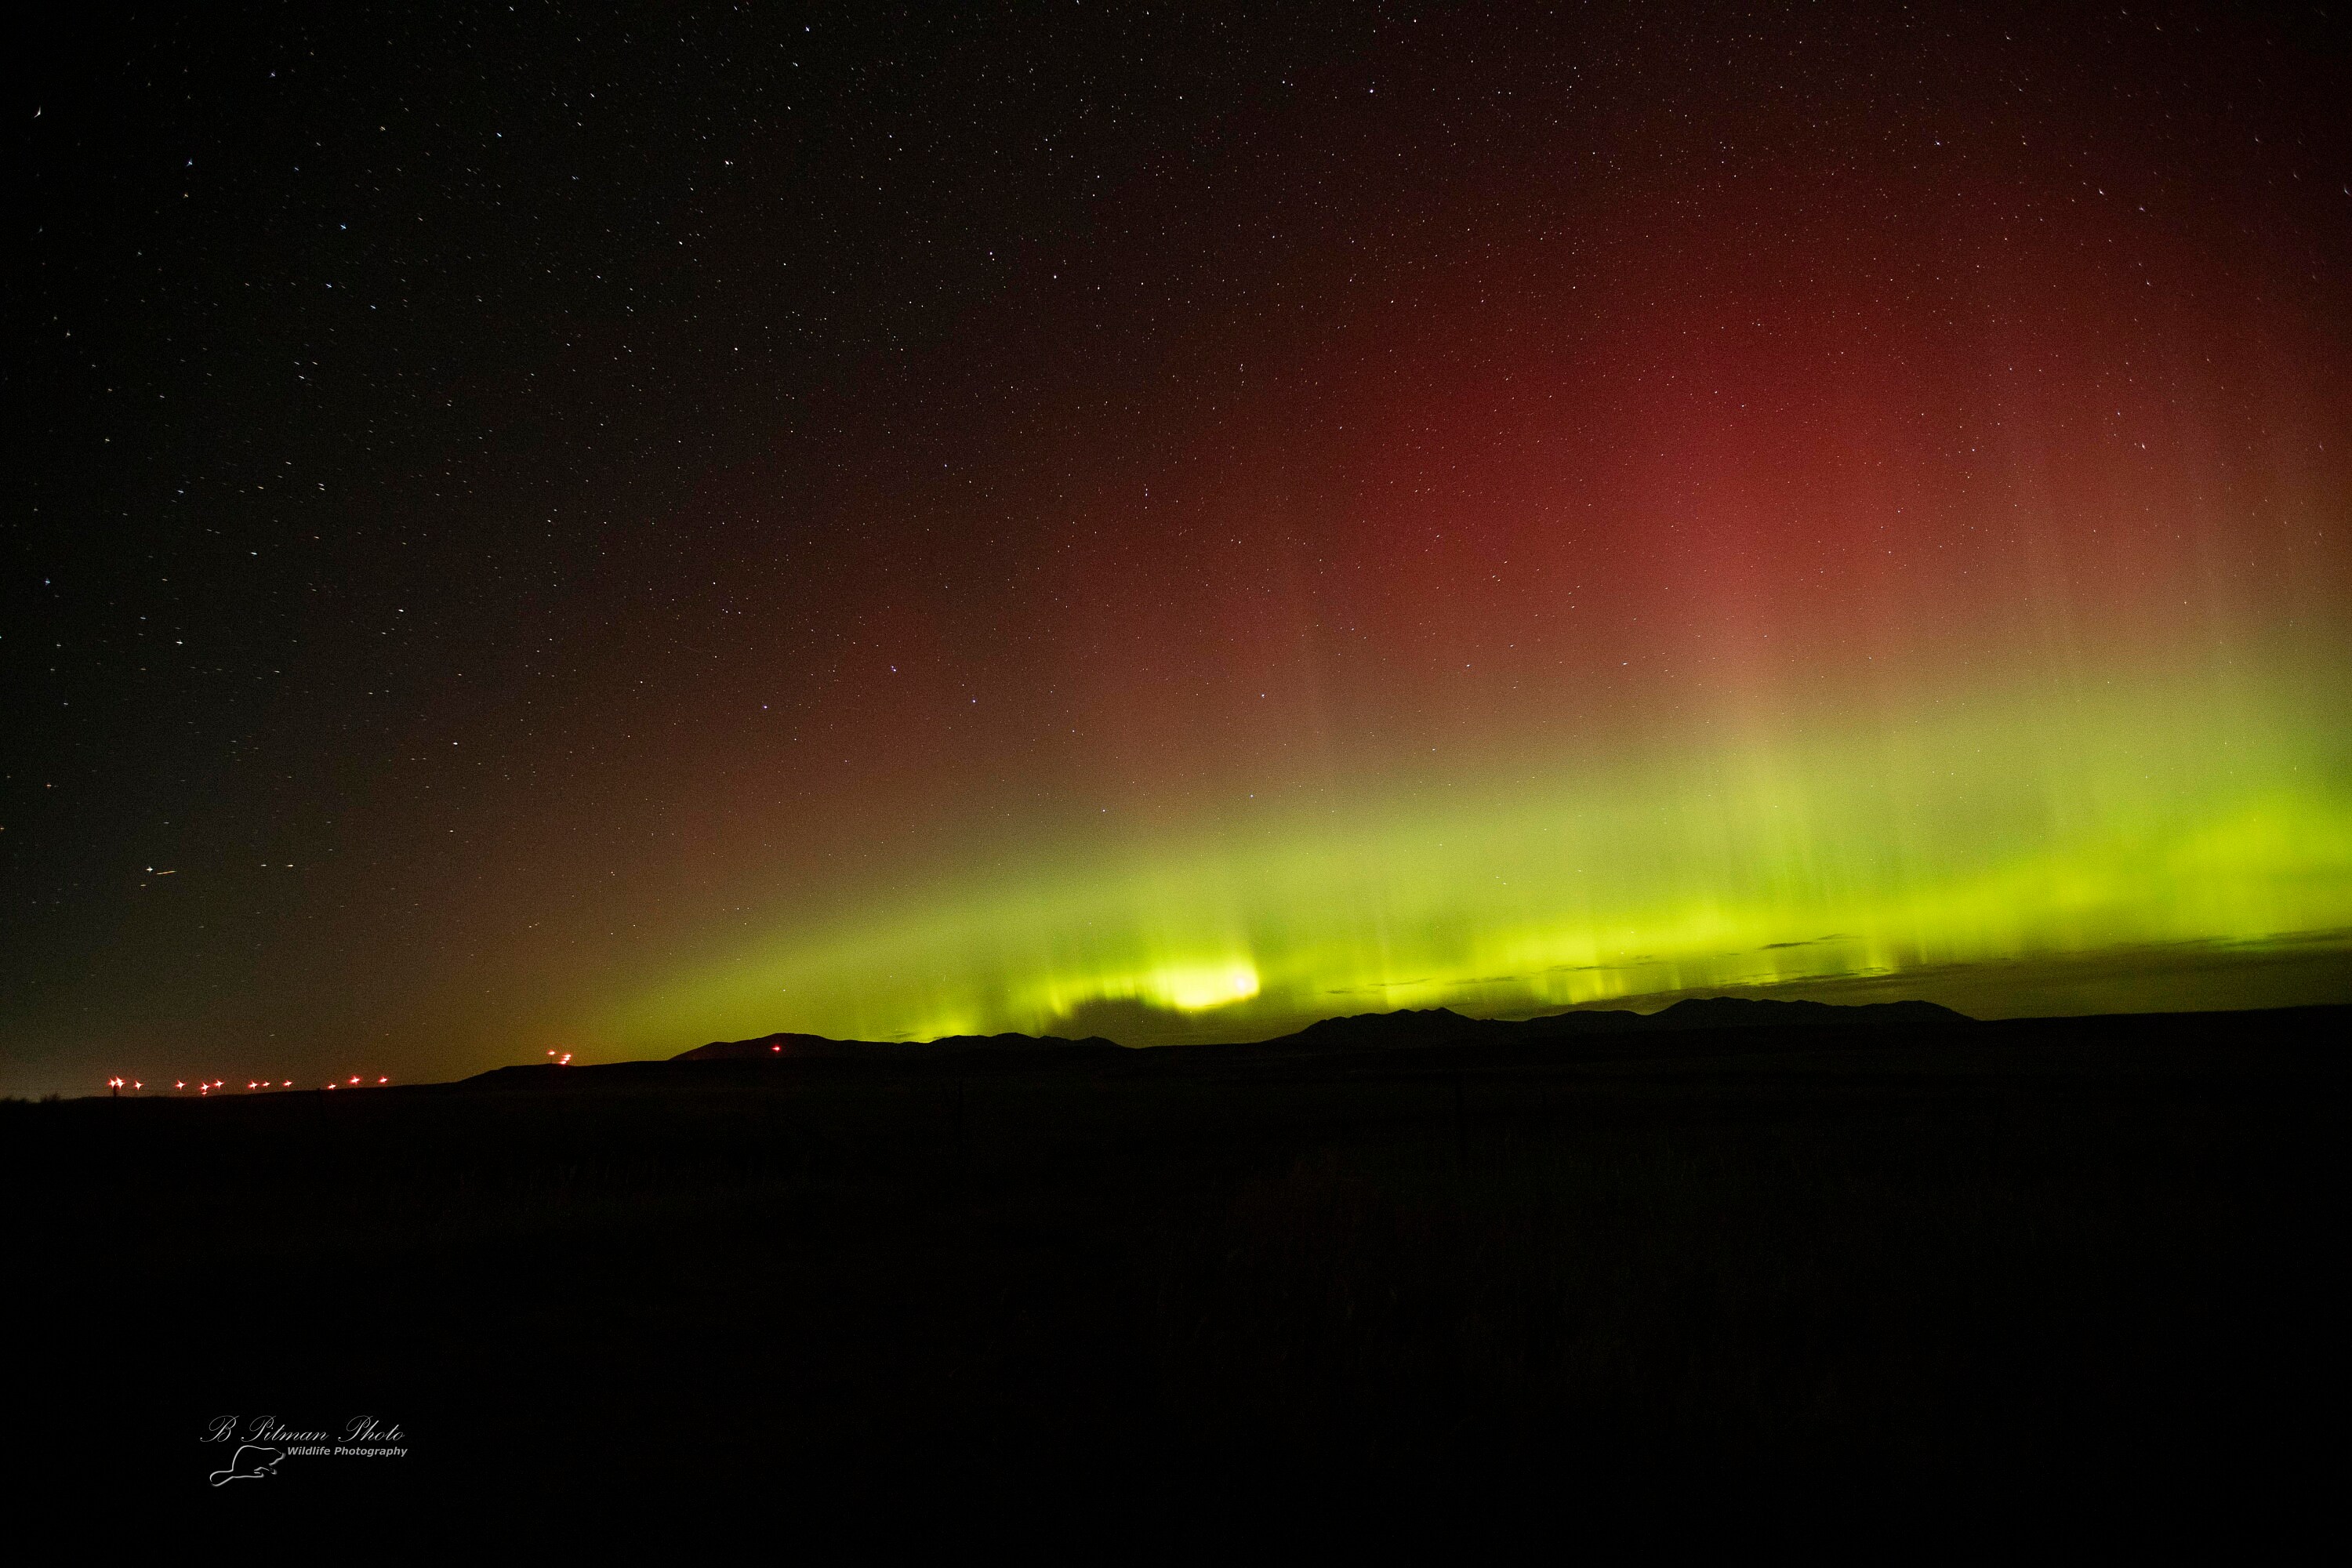
On August 30th I was given an opportunity to test this theory in practice. While driving across central Montana my Aurora application notified me of a potential aurora. So I parked and setup my tripod and camera with my typical settings (5600K, 13 sec, F/2.8, ISO 3200) to capture the first photo below:
I then adjusted my shutter speed to 1/2 second, and ISO to 12800 to capture this photo. No changes to White Balance or apeture:
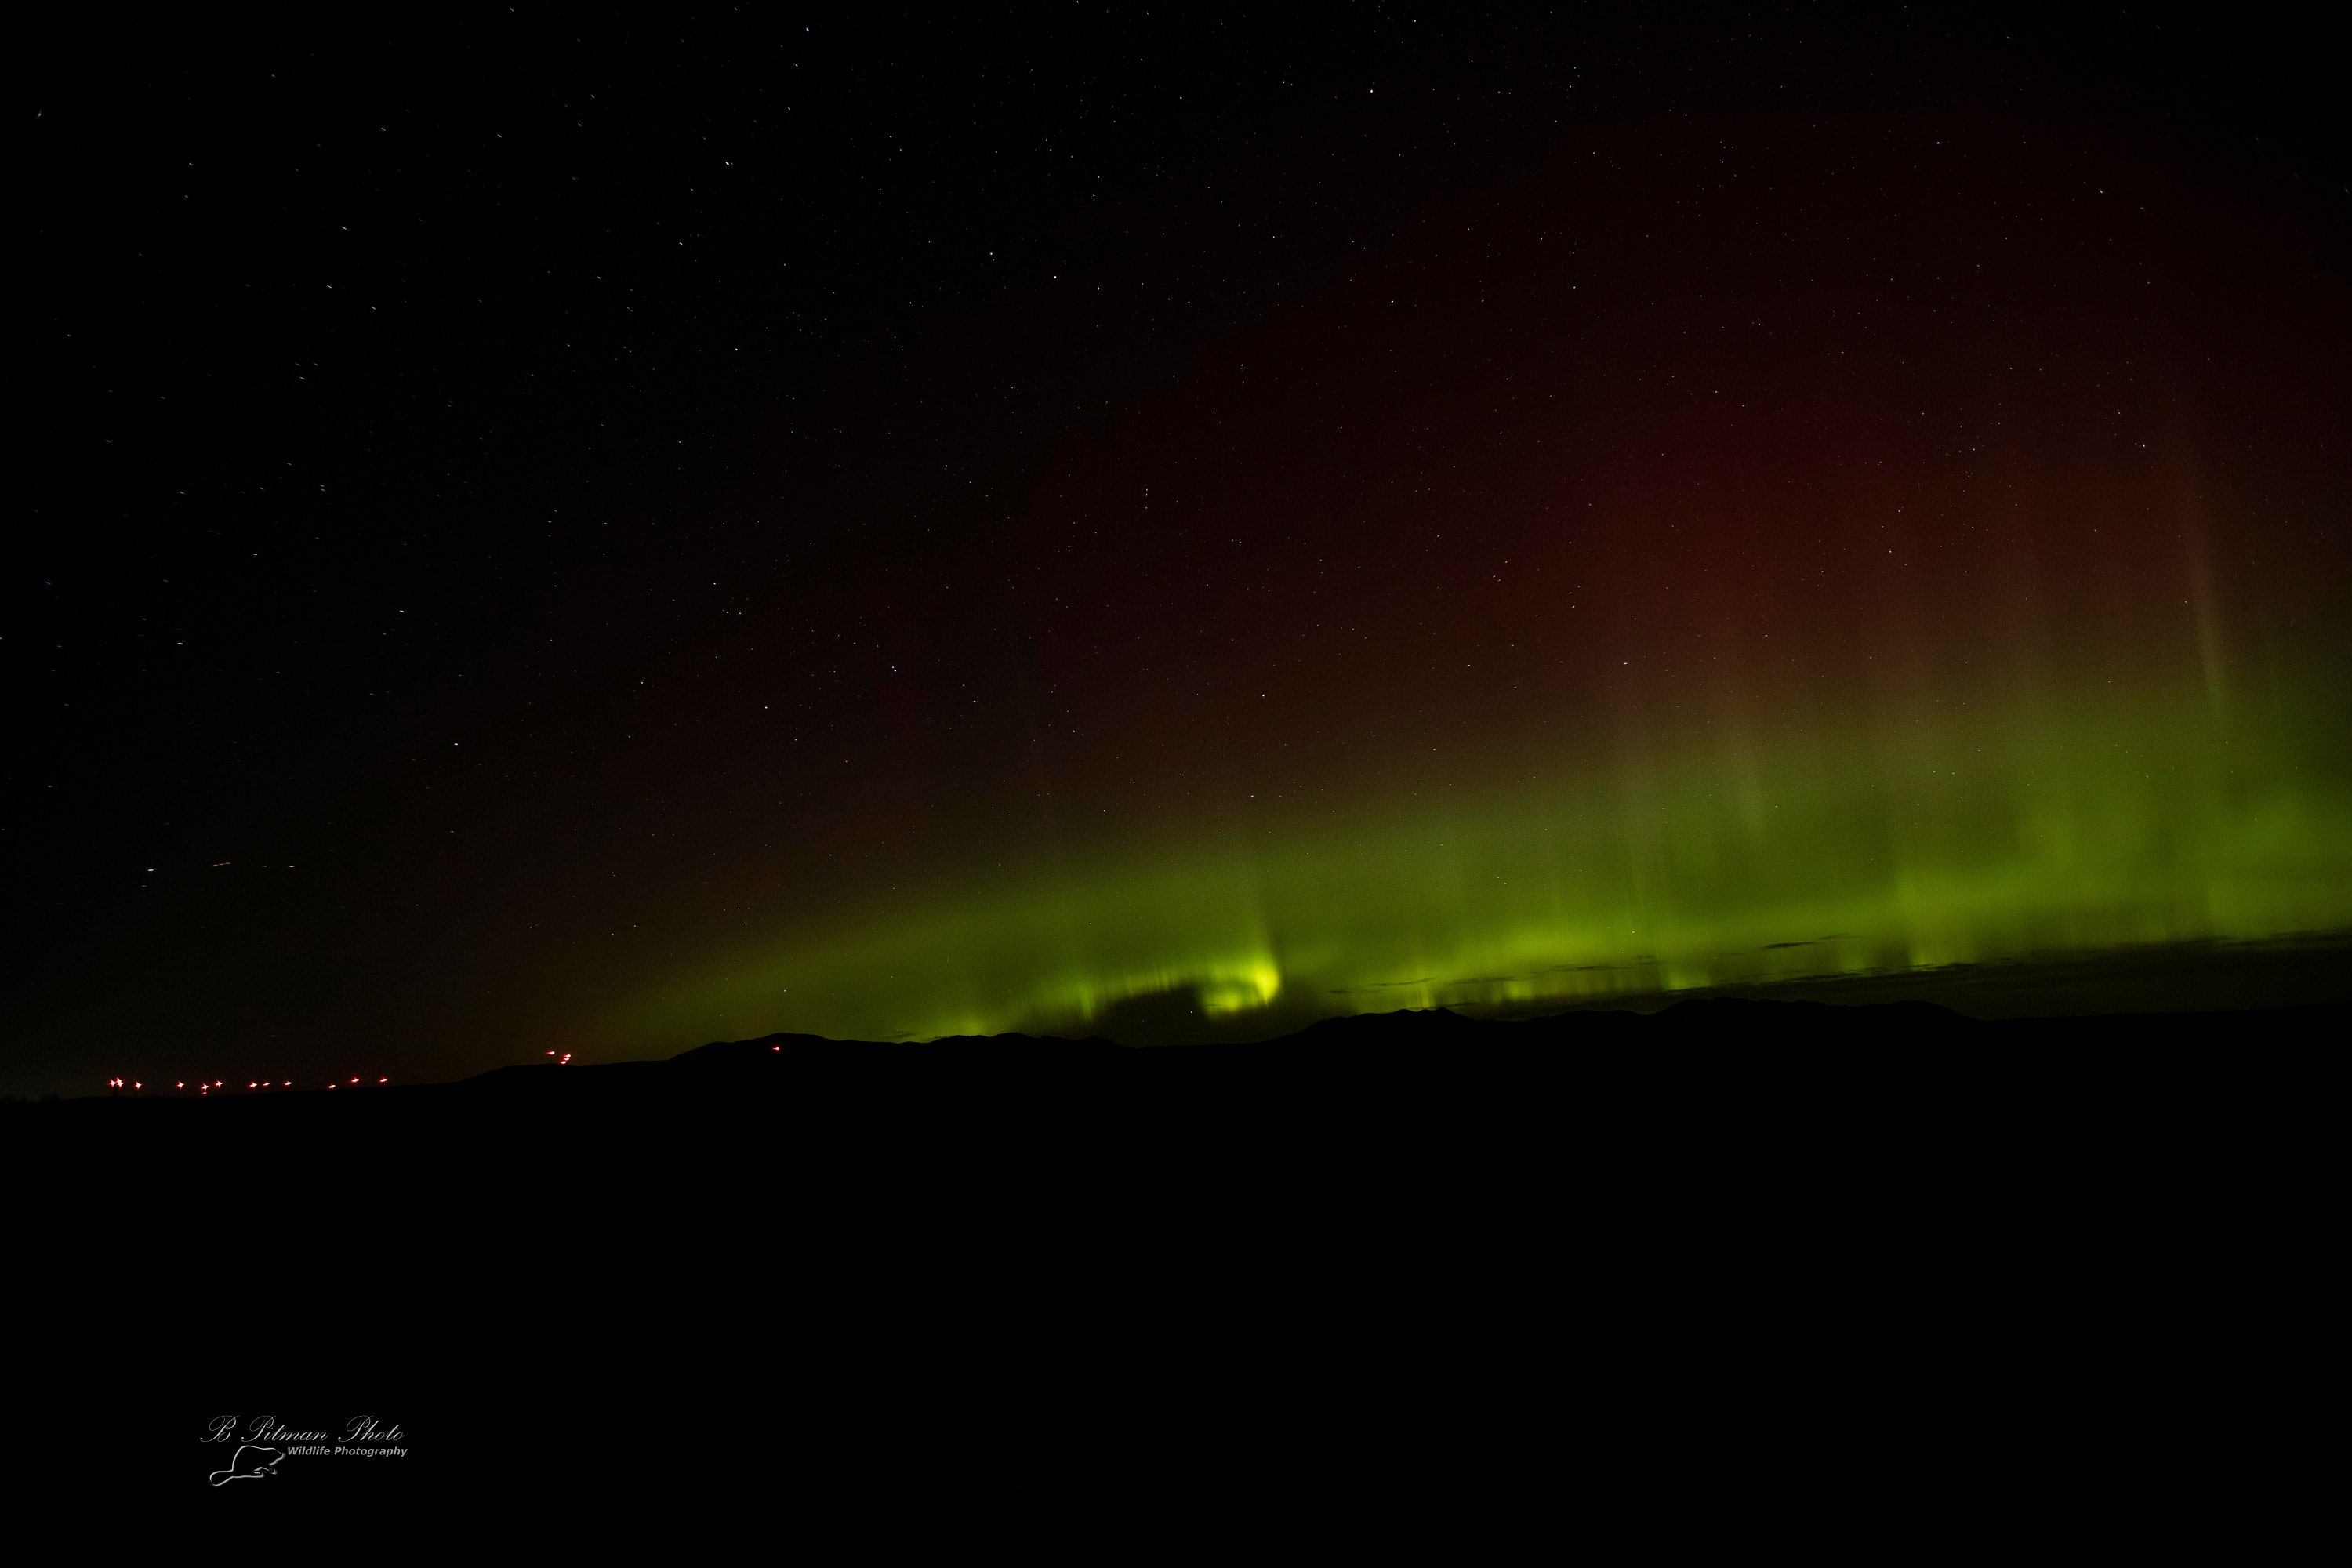
Just as I had theorized by shortening my exposure I was able to "recover" the greens from the yellow exposure. By shortening the exposure I prevented the motion of the aurora from mixing the high altitude reds with the low altitude greens and was able to capture both the reds and greens (though faintly).
I felt this validated both the criticisms of my August 27th Photos and the honesty of their processing and presentation by yours truly.
Conclusion
So thru all of this, I feel that I have gained some great insight on how to photograph the aurora to get honest color capture of the aurora colors, even when they cannot be seen with the naked eye. The color captured by the camera depends greatly on both the White Balance setting, and the choice in shutter speed due to the additive mixing of emitted colors by the aurora.
For me I believe that the best combination for capturing true aurora colors is a combination of Neutral 5600K White Balance, Wide Open Apeture (on a fast lens), as short a shutter speed as possible while still getting an exposure, and a high iso.
The drawbacks of this honest color capture are numerous. High Grain, low exposure, little to no foreground illumination, and overall less striking photos than offered by a long exposure.
After considering more of what I had learned, and thinking about the "right" white balance many use as a way to capture the aurora with it's green glory, a WB of 3500-4000K, I realized that modern tools offer a compromise that maintains (or recovers) the true aurora colors without relying on a complete photo color shift.
By adjusting only the Yellow Hue I would be able to recover the green, show the honest high altitude red and maintain a lower ISO for less grain, and longer shutter for greater exposure. The main compromise is the loss of detail in the striations and undulations of the aurora in a single exposure. But those are better captured in locations where color is present to the naked eye with brighter auroras. For lower latitude auroras the loss of individual rays for a more striking exposure I can live with.
These final photos are edits of the above using the yellow hue shift to recover the greens that were lost thru the mixing of the reds and yellows. Please enjoy and let me know your thoughts!